CLICK HERE FOR FREE BLOGGER TEMPLATES, LINK BUTTONS AND MORE! »

Monday, July 19

Aubrey, Jayden & Kaylin

 How this for bright bold colors (hot pink, pink, green and black) that we were to use over at Ella's Pink Elephant  Sketch #16 for this week . These photos are of my second cousins back in 2001 The Twin girls and Jayden were the newest addition to our large family. I used Recollections green polka dot paper, Hambly hot pink screened acetate, black and lt. pink cardstock and a black and white gingham paper. I used several punches on this layout which also qualifies for the Frosted Designs challenge this week to use border punches. EK Success flower punch, Martha Stewart border punch, Fiskars edger scissors and a scallop punch. Pink and green buttons and Stickles and black fine pen for writing and doodling a bit.

Friday, July 16

Welcome to Frugal Fridays week #11

Now that were in the middle of summer and its getting pretty hot outside I don't mind going into my air conditioned scraproom and spending a few hours to cool off. So I've been making some of my own embellishments with old books, maps and misc scraps I have. I  grab some round, scalloped and floral punches and/or I use my Gypsy ( I just love my Gypsy) and start punching away on those pages from the old books or maps, old dictionaries work well. After I have punched out several shapes, you can either ink, chalk or spray the shapes and then layer them to make your own flowers and attached with button, brads or eyelets. With my Gypsy I make a template of the shapes in different sizes and save so when I need some flowers on a certain designer paper I just upload my template and cut away. As far as old maps, which no one ever uses them anymore, now that they have GPS, they work great for your travel/vacation layouts for your background papers or more details on your vacation spot if you have collected them for souveniers.
Here in the above picture I have used several punches /and my Gypsy to cut the petals from designer papers and plain white cardstock and used glimmer mists to achieve the colors that I wanted all attached with a brad which I heat embossed to get the shiny colors I wanted also. I just cut out of green scrap paper some leaf shapes and doodled with black marker and attached to the flowers.
In this photo I used several floral punches in all sizes and punched from an old book and then I chalked them several colors and then layered  4-5 of them and attached with heart brads, I have sometimes just left them the flowers black and white and they really look nice also. Well enjoy the summer and take some time to make your own embellishments.

Thursday, July 15

Cute Clowns

How's this layout for bright and colorful...simple and easy to do also. This is my take from the sketch at Creative Scrappers this week #112. When I was looking thru my photos to scrap this sketch with- these pictures of my Eskies jumped right at me and said this would be perfect and it turned out great. I used a red  & white cardstock for the background-went thru my scraps and found 6 colors that were in their cute little clown costumes for Halloween and ink the edges in black and cut the photos to size and a few in circles with my Fiskars circle cutter and used chipboard letters painted with  6 colors of acrylic paints to match and added 6 colors of brads to page - whoola done.

Let it Snow- Izzy

I know it is summer but these photos of my Eskie "Izzy" worked well with this layout from My Little Sketch Blook this week and they happen to be when she was playing in her first snowfall. I will be applying this layout to Liz Qualman's sketch challenge and to Practical Scrappers weekly "embossing" challenge. I used  many papers from Recollections, DCWV(embossed squares), My Mind's Eye, and Stemma and solid colored cardstocks. I used my Fiskars circle cutter,  several snowflake stamps, inks in spa and coffee bean and white , clear stardust  and white gel pens, heat embossing gun and stardust & white embossing powders, brown zig pen for journaling.

Tuesday, July 13

Cheryl's 8th Grade Portrait

I just love it- love it- love it!!! My DD's 8th grade school portrait and I pulled the colors that she was wearing out in this layout and her golden hair. I am applying this layout to the Practical Scrappers challenge this week "embossing".This is also from a sketch at Creative scrappers a few weeks back both of these blogs really inspire me in my layouts. I used many papers from"Scrap Works","Blue Cardigan Designs",and "The Paper Loft" and golden color cardstock for matting, cream cardstock for stamping butterflies and a saying with a bit of journaling. Added a border of cream lace and embossed the butterflies in white, blue and gold colors. Stickles in purple, teal and diamond was used, gold metallic marker. Stamps are Martha Stewart "butterflies" and Heidi Grace for the saying, and some individual words stamped in lavendar on the background paper

Monday, July 12

Beach Bums

Here is another summer beachy layout for the Practical Scrappers Sketch challenge and their monthly challenge themed "Just Beachy"  I used We R Memory Keepers sun shape( half of it) and some teal background paper and some photo paper that I sprayed with 3 colors of glimmer mists and then cut out some water spouts, drew some highlights in with a white gelly roll marker and used pop dots to make them really pop.I doodled with black marker some frames for the photos and added a Fun in the Sun vellum and a chipboard letter for the Title Beach Bums. I then journaled in the middle of the sun and added some more doodling to that also. This layout is for my son Eric's scrapbook.

Just add Water

Now how this for a summer beachy layout- at the beach, pool and rafting on a river all in one weekend a few years back up in Shawano Wisconsin on a family trip. I'm using this layout toward 2 challlenges this week at Practical Scrappers for the Just Beachy theme and Sketches in Thyme for their weekly sketch.
 I used papers from DCWV Summer Stack,sandpaper, colored cardstock,and acetate for the title and sub titles. I cut  from designer papers the flip flops, shells, and blue palm tree with summer beach words, cut my own waves to fit as the border and circle cutter for the one picture and journal spot. I then drew my title on with a vellum writer and painted with white and blue acrylic paints on the back and trimmed out and attached with pop dots
I torn some papers and the sand paper to look like the beach and used orange and brown inks on some of the edges. So lots of water does equal= FUN in the summer time, my kids had a great time that weekend.

My Father-Heritage

This is my first attempt at doing a heritage layout-which was a little different but I had a fun time doing this one. It is a picture taken of my father back in 1950 with his first car at the age of 18 I believe, I haven't journal on the memo tag yet because I want to get the correct information from my mom. This layout is being applied to  Ella's Pink Scrapbook #15 for a heritage layout and also over at Frosted Designs to use felt on your page. I used several different papers in tans, browns and greens and used my Cricut along with my Gypsy for the several different cuts with the Heritage cartridge-tree, car, light post, and fence. Sticker letters with brads, glitter for the light post and sprayed Glimmer Mist on the felt ribbons on fence, and used several colors of chalk. Attached some premade designs that I cut out from papers and added a felt "remember " at the top, and some laser cut floral paper also.

Saturday, July 10

Michigan

I just love taking outdoor pictures of my kids especially at Presque Isle in Marquette, Michigan with the birch trees and Lake Superior. So here is another layout of the beautiful outdoors of my 2 sons back in 2001. I am applying this layout towards 2 challenges this week, one at FCCB#17-creepy crawlers/bugs and the color orange, and the other challenge is the sketch from Sketchy Thursday which really worked out great for these 2 photos. I spent about an hour figuring out papers which are  all different brands and inked the edges on all in coffee bean. I used a chipboard letter M and cut the rest of the letters from my Cricut using Lyrical Letters. I attached a chipboard tag that I made with 2 different ribbons in brown polka dot and a green stripes and another chipboard tag that says "tradition".
 I used several cartridges for the dragonflies Lyrical Letters, Doodlecharms and Gypsy Wanderings which I layered them added rhinestones (blue, green and white) and  Stickles copper glitter to each.
I pulled the rusty or orange color out in the matted photos and background and in the tag. I also found some light orange paper to journal on with a fine black marker and inked that up a bit to match the rest of the layout. Oh yeah I cut out the outline of Michigan from 50 States cartridge and attached to the letter M. I'm really happy how this paged turned out this will be added to my son's Eric's scrapbook..but I have another page to do for the other son...wish I could just copy this one.

Friday, July 9

Frugal Fridays week #10

This week's tip is for you to go visit your local library on a rainy day or take a nice summer walk if you live close enough like I do. Sign-up and get a library card and then you and your family can check out the books and take them home with you - or spend some time reading them there. You can find many books on the subject of scrapbooking from the beginner how to get started to the new and lastest layouts.  Some libraries even carry some old/current magazines issues that you can check out also. I like to check out the books on organizing your hobby rooms and tips and tricks for paper crafts is a great one as you can see here. I liked it so much I went out and bought it a few years back. Also there is a section for card making books, which has alot of good ideas in them also for scrapbooking. The library is free so why not take advantage of it when you can.
 Enjoy reading!

Thursday, July 8

Young Lady

 I was excited to try some new paper flowers which I saw done by Crafty Girl- Barb on her blog and also on She's a Sassy Lady's blog -what a great tutorial they have -so you should check it out- I love to work with papers since I have so much of it. Well this is a sketch from Paper Poppy Kit for July and this will be applied toward this challenge.
 I used K&Company paper and some misc papers that matched in colors, eyelets,  ribbon, K&Company lady bugs, blue and green rhinestones, stickles in green and blue and chipboard numbers and a fine black marker for some doodling. I torn the edges of the main background paper and then burned the edges a bit(what a mess this leaves)
On the tags to the left I found paper that already had the letters I wanted stamped on, so I just cut the area that I needed which are my daughter's initials and then wrote her name on them, inked the edges and added a rhinestone, eyelet & ribbon to them.

Victory Lap

This was a fun page to do with all the bright colors and the first time I did the flags on a page-I think I will be doing a few more pages for my other kids scrapbooks with flags. I'm doing this layout for My Little Sketch Blook from the sketch for July.

 I used papers from We R Memory Keepers the "Nonsense" pad,vellum saying,circle punches,bright orange and red polka dot ribbon,chipboard letters for the title, stickers letters on the flags for the town we were in and the state of Wisconsin, and teal ink and white acrylic paint dry brushed on.

Goofy

This is a few of those silly/ goofy photos that you're not quite sure what to do with but want to keep them. So here is my entry towards Practical Scrappers this week for animation, character, cartoon on your layout. I used Goofy from the Mickey and Friends Cricut cartridge to cut it out and the name Goofy as my title and found some misc scrap papers to use. I hand stitched a circle in black thread and journaled on the right side of pictures in black fine marker, and also inked the edges in black.

Ball Park-FUN

Here is my entry for this weeks sketch over at Creative Scrappers #111-I just love there weekly sketches gives me inspiration to get another page done each week. I used several We R Memory Keepers designer stack papers from"tiffany's" and their embellishments also on this layout -so it was pretty easy to do since everything was right there in the paper pack.
I inked the edges of some of the papers in Staz-On brown and cut my own borders around the photo to represent the front of Wrigley Field a bit. Cut out some flowers and layered them with pop dots and used the sticker letters for the title and Go Cubbies on top, and outlined them with a fine black marker. Made a journal tag and used a white gelly roll pen to journal with.

Wednesday, July 7

Fireworks-4th of July

This is my take of the sketch over at Practical Scrappers- Sketch Friday. I used several scraps of holiday red, white and blue papers for this layout and inked all the edges in a "latte" brown  with red and blue cardstock for mats on photos and dry brushed the light blue mat in blue paint. Used 2 vellums and painted stripes on them also, along with 2 hand cut tags with journaling and a red star brad on each . I used rub-on letters for the "fourth of" and chipboard letters painted in "regency blue" acrylic paint for July, with some doodling  to make them stand out a bit more. I also journal on the red paper the events of the day at the Ishpeming Parade in Michigan. This is my DD pages from 2001 and she played with this new little black lab puppy all day at camp (which is hard to see) in the photo.

The Ishpeming 2001 Parade

 Here is my take for the challenge over at Sketchy Thursdays..It was a 2-page layout this week and these pictures of my DS back in 2001 worked out great. I inked the background white cardstock with "latte" ink and used some scraps in red cardstock and blue cardstock andcut some stars from a patterned paper and found some striped paper in red, white and blues to go with. I used edger scissors and had cut the red scalloped edge  and wrote on them in a white gelly roll pen the title. Added a small journaling tag also inked in latte brown and did some doodling in white on the pages.
My DS all dressed like the all american boy for the kids parade in Ishpeming, Michigan. Both of my sons lead the parade on their roller blades all decked out in red, white and blue. They had a great time and loved all the attention they received that day for their costumes they came up with at the last minute.

DD's-8th grade Graduation

Here is my DD graduating from 8th grade back in 2001, with her great grandmother, grandmother and her favorite teacher. This layout or sketch was hard for me and I think it looks a little sloppy, but I gave it a try for Sketches in Thyme this week.
     I used several pieces of scrap papers in the red and white theme, since those were the school colors, on a black and gold paper for the background. All the cuts were from Cricut cartridges. Congrats from Tear Drop, 8th and the scroll from Heritage, and the swirls and stars from Lyrical Letters. I only did a little journaling on the scroll and on the red strips of cardstock to each side, used 1 red brad and some stickles, crystal glitter glue.

Tuesday, July 6

Had a Great 4th of July weekend

 Well we are back safely at home from our 4 day trip to the great U.P (upper Penisula) Michigan. I just love it there..lake superior, the lovely landscapes and family and friends to enjoy. We had such a busy schedule in the short time we were there. Saturday morning was the 1 1/2 hour long parade in Ishpeming, Mi. which I got a little to much sun, but the weather was unbelievably warm for this part of the year up there 93 degrees. We had a family (my cousin) Wedding at a gazebo outlooking Lake Superior in Marquette, Mi on Saturday afternoon..its was perfect and went to well, then the reception followed that with great food and lots of fun with the large family we have up there. Then on the 4th we went to my uncle's camp out on Bass Lake to celebrate the 4th with tons of food, swimming, sauna, pontoon boat rides , fireworks and games and all 63 of us that were there had many laughs and great memories were made. All in all we all had another great 4th of July. And this year we took out new Eskies (Izzy & Jenna) who just turned one in January with us and they just loved it up there and they got lots of attention from everyone. You can see the smiles on their faces in this photo of them -we were getting ready to go to the parade on Saturday morning. Here is a photo of just a few of us who went to the parade-most of the relatives were getting ready for the wedding to take place in the afternoon.

Friday, July 2

It's Frugal Friday once again. week #9

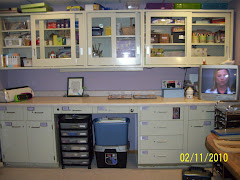
First of all I would like to wish everyone a very Happy and safe 4th of July Weekend coming up. I will be with family in Upper Michigan attending a wedding , parade and fun times to be had out at my uncle's camp (which is a tradition every 4th). So this week I will show you how I organize my cricut supplies and cartridges, which I now only have 25, but plan on expanding that as time goes on. Here in this first picture- I have my Expression and Gypsy on my counter all the time,so its easy to get to and use. And I have a few hooks on the wall to hang my many mats in different sizes.

In this picture is my cabinet which holds all my supplies and cartridges for my Cricut Expression and Gypsy. I purchased the boxes from Cricut they hold up to 8 carts and overlays and they have them available in 2 colors (blue and orange), so I use on for designs and one for the fonts.You can write on the side which ones you have in that box. I need to purchase some more of these. I then just store the empty cartridge boxes in another closet so they don't take up my craft space. In the blue and green box to the right I put all my extra blades, cords and blade housing units here.

And this final picture is of the cartridge booklets , one box for designs and the other for fonts. When I get a new cartridge I rip out the other languages and just keep the english version pages, so they are not as thick that way. And I try to keep them in alphabetical order so when I need them there are easy to find. I'm sure these plastic containers would hold about 30 booklets each, which is pretty good and I use the clear box so they are easy to see. Well I hope this is idea you might find helpful in storing your Cricut cartridges.

Thursday, July 1

All American BOY

I'm  packed and all ready to go on my 4th of July weekend trip to Upper Michigan and I have a few hours to spare before we leave so I hurried downstairs to do one more layout for some challenges this week. And it just so happens the challenges over at Pink Elephant is a sketch and color theme of red, white and blue, and over at FCCB #16 it is the Theme -4th of July and to have a star on your project, and Frosted Design's challenge is Stars & Stripes with red white and blue...Wow 3 challenges with 1 layout.. So this photo of my son taken in 2001 in upper Michigan at the Ishpeming parade was perfect for them all. I used white cardstock inked with brown all over and the edges, red and blue cardstock for all the other papers used. I cut the large red star from Accent Essentials cartridge, small blue and red stars from Doodlecharms ,blue star border from Doodlecharms- welded, and the title in blue "All American Boy" from Jasmine cartridge also welded and used  my Gypsy to lay this all out. I used several buttons tied with silver thread. Added a wide red, white and blue silver ribbon to center of page with 4 silver buttons attached. I made my own 2 journal tags from stars and cut it to look like fringe, used white gel pen,  added Stickles glitter to stars and title. I did this is a bit of a rush, but really liked how it turned out. So now I'm ready to go celebrate with family and friends the 4th of July. Hope you too have a safe and Happy 4th.