CLICK HERE FOR FREE BLOGGER TEMPLATES, LINK BUTTONS AND MORE! »

Thursday, September 30

Creative Scrappers weekly Challenge #123

Here is my take for this weeks sketch at Creative Scrappers this week of my home that I sold back in 2002. I tried something different this week I did many layers of paper. I saw this in Creating Keepsakes magazine -so I scrap lifted the idea and used the sketch from Creative Scrappers and I really like how it turned out.
I will be applying this also over at Practical Scrappers for this weeks challenge of Stamps. Materials used are the following: K&Company, Anna Griffin and Newspapers were used. I burned the edges of the newspaper. My Angel Company- bird and leaf stamps, cut out letters for the titles, cardboard-crimper, chalks, inks and  pop dots

Tuesday, September 28

Simple pages are nice to do too!

I sometimes find that the simply pages turn out just as nice as the ones that I work on for hours. I didn't want to use alot of colorful papers, and  yet I wanted to have embellishments that went along with the pictures, so I found this gambling paper and just cut a few strips and cut out several of the dice (which the pairs all add up to Lucky 7) except by the journaling tag that I made and attached with pop dots. And used my Cricut to cut out  "Vegas" from Tie The Knot cartridge and woolah it was done in under 1/2 hour.

Monday, September 27

Family-Parade-Camp

This was a simple page to do yet with so many pictures not much space to play with so I just added the stars with a few words that descibe the day . I used red and blue cardstock, stamped  a star with words  in light blue ink on white cardstock and placed with pop dots and then wrote a few words on them. This take is for Sassy Lil Sketches this week.

SWEET 16...

This is a lovely sketch over at Sketches in Thyme #16 this week and I really spent alot of time on this layout-so many details and layers for me-but it turned out great and its another one of those layouts for my scrapbook and not the kids...I will be applying this over at Frosted Designs for the color challenge of Peach and Cream also which worked out well with this photo of my Daughter.
Heidi Grace flower paper, DCWV peach monogram paper, misc papers in peach and cream colors. Rectangle doily cut and used as a mat for photo sprayed with glimmer mist and paper over the top of that with gemstones attached. Cricut cuts by George Basic Shapes, Gypsy Wanderings for leaves and scalloped & 16 tag. Several floral punches to make the flowers, brads,more rhinestones, Fiskar edger scissors-victorian and heartstrings and lace attached behind the large circl and a pink floral ribbon in center. Chipboard letters stamped with floral design in salmon ink and rhinestones in a few places. LePlume markers (victorain rose) for some doodling.
This is a side view so you could see the layering of the large circle with the lace underneath , which you have a hard time seeing in the other picture. Another page that I really enjoyed doing this weekend.

Sunday, September 26

My take on sketch from Sassy Lil Sketches

Another layout for the kids scrapbook when we sold and moved from our home back in 2002. I used several different papers from DCVW, My Little shoe box, Marcella by K and misc scraps I had. I cut the embellishments from papers and the chipboard butterflies I had laying around in my misc pile so not sure where there from. Made my own little for sale-sold tag and did my own journaling. This will be applied to Sassy LiL Sketches this week.

Enjoy LIFE...

Oh !!!the flowers are just so pretty and I made them from paper towels- I saw this idea on Beatriz Guzman's blog Amazing Grace about 2 weeks ago and knew I had to give this project a  try. And I made about 100 flowers in a variety of colors to have for future layouts-thanks for the tutorial on them Beatriz. I used papers from the paper stack by Colorbo'k, machine stitches around the border and on the strip at the bottom in white, painted chipboard and sprinkled glitter on them, the flowers and made from paper towels sprayed with tattered Angels mist and attached pearls to center, tag was stamped with saying and leaf pattern and ribbon attached, the title enjoy life was cut from Lyrical Letters cartridge using my Gypsy to weld from Core'nations teal paper and sanded, then attached 2 tickets in the corner. This is the sketch from Creative Scrappers #122 this week , and I'm really happy how it turned out-and this page is going into my scrapbook!

Friday, September 24

Welcome to another Frugal Friday #21

     Well its is now Fall and the weather here is just beautiful-Indian Summer I guess they call it- and I got my shorts and summer tops back on, this won't last too long-so Im going to enjoy it while it lasts. So on with the tip of the week.
      While I was up in my bathroom the other day looking for some q-tips (cotton swabs) it came to me all the different items that I had that can be used in my scraproom to help me do my projects. So I dug through the drawers and cabinets and found these items that might be helpful for you too.
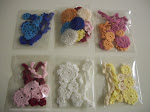
Cotton swabs, cotton balls and those facial wipes are great for applying your inks and chalks, old or new eyeshadows come in so many colors-just like chalks and they work just as well- so don't throw them away, add them to your collection of mediums. Nail polish- well that is just like paint -they come in a variety of colors and glitters and are easy to apply with the appplicator for those extra little touches to a card or a layout. Do you have just one earring or a broken necklace in your jewelry cabinet- well there again don't just throw it away- take it apart or use the just the one piece as an embellishment. Those little pill containers that you can get anywhere are great little for storing  brads, beads or small misc items to take with you on retreats or get-togethers without having to take your whole supply with you. And some more little containers that I found with all my nail stuff  are those that come with the variety of fake nails (when empty) they are great for more brads, beads sequoins or even buttons. And now for the few items I have that are in the front of the photo-nail file great for sanding your papers and  those  little areas you need to get to on your embellishments. Don't have any thread well dental floss will do and they do come in a couple different colors - red, green ,blue and white. And the good ole' toothbrush- I have used this with painting since I was in high school. Put your paint on the brush( not to thick) and flick it( rub your finger over the top ) to the area you want to be speckled, makes for a great background look. And you can use several colors to acheive the look you want. Oh and one more item I forgot to put in the picture is your handy tweezers (which you probably already have in your scraproom). But if not, they are great for picking up those little items such as beads, brads, and sequions and placing them on your project easier.
Ok- your now thinking she is crazy!!   No -I'm just a little Frugal !! lol  See ya next week at Frugal Fridays I will be posting a new blog candy to be given away to one lucky winner.

Thursday, September 23

Home Sweet Home-SOLD

This is my old home we sold back in 2002-this is for my daughter's book and again I have not journaled on this page because I want to get the words or thoughts from my children when I write on there pages about the day we moved. I have 4 children and  they all had different feelings about this day.
               So this is the layout for this weeks challenge at Sketch Friday at Practical Scrappers.
I used K&Company paper, LePlume markers, chalks in pink,red and blue, white gel pen, Fiskars border punch and cut out the embellishments(flowers) from the K&Company paper pack.
I used all K&Company papers and cut out all the embellishments and used pop dots for a 3-Dimensional look. I drew my own birds and chalked them and then doodled with markers on the birds and around the flowers. Also used Fiskars border punch and made a journaling spot also covered in chalks.

Wednesday, September 22

They Light up our Life.

      Oh no !! !I cut up the enlarged Photo. That was the challenge this week at Frosted Designs and it was different and I was a little bit leary about the first cut, but it was fine after that. I wanted my layout to look like a window so I framed the 8 piece photo with dog bones that I cut from the Mickey and Friends cartridge and added a strip of Adorn It paper- I love my dog- and from the same cartridge cut out paw prints and added them to the page. I then wrote my title on the bones in white gel pen and doodled on the bones to highlight them. All bones are attached with pop dots for a 3-D look. The paw print paper is Reminisce. I used a grey blue cardstock behind the cut up photo. I just love how it turned out, and I had so much fun too. I will be cutting up some more photos in the future.

Izzy & Jenna  on 4th of July this year in Michigan.


Twas the night before Christmas"

I know it still kinda summer out and here I am doing a Christmas layout---but that's how it works when I'm doing all my scrapbooks in chronilogical (spelled ?) order and I can't start the next year of pictures till I get this years  done. So here is my take on this weeks sketch at Sketches in Thyme. I thought this layout would work out great with the hanging stockings in place of the hearts like on the sketch. Also will be applied to Practical Scrappers ribbon challenge this week.

I like to take a picture of our Christmas Tree every year on Christmas Eve with all the presents surrounding it for my scrapbook-great memories for me. It takes me 2 days to put up my tree and all the holiday decor in the house- so I like to capture that. I used My Minds Eye paper and misc scraps, red & green inks, pop dots, red sequoin ribbon, white lace ribbon,border and scallopped punches, stickles, black 3-D gel pen and the stockings were cut outs from some holiday paper.

I'm so excited---My oldest daughter is Engaged!!!!

I was nicely surprised when my daughter called me the night of her 26th birthday(on the 15th) -after she went out to dinner with friends to tell me the great news. Mom-I'm engaged!  She was crying with happy tears while she was telling me, and I was so happy for the both of them. They have been dating for about 7 years and they purchased a home this past May and a few days before her birthday, her boyfriend (now fiance) got her a puppy...which she thought was her present. So when he proposed she was shocked and very surprised. Well I guess I'll be busy helping her plan for this great event-I might be doing some crafty projects in this next year- wedding related of course, and alot of pictures to scrap in the future.
This was taken on moving day last May into their new home. I'm so excited and proud of both of them...now we can only wish for grand babies next.

Tuesday, September 21

She's a HOTDOG on Skii's

This was my daughter's first time water skiing and what a HOTDOG she was... with some other photos of that  4th of July weekend in Michigan.  This is my take on the sketch over at Sketchy Thursdays this week. It was to have 8 pictures which is alot, so I only had 5 for my layout. I used K&Company Summer pack papers with some torn edges and handcut several (10) floral like chipboard pieces and painted them in 5 different acrylic colors and then added a dimensional glossy accents around the edges of them and Stickles on them. The title was premade chipboard letters- not sure name brand on this though. Attached white ribbon on corner mats of photos which I painted also. I did this layout in about an hour-which is a record time for me- usually takes an hour to figure out the paper I'm gonna use..lol

Monday, September 20

Trick or Treat

I just love this time of year and love the colors to play with-Here is my Daughter at Halloween with friends and carving pumpkins- You're never too old to carve pumpkins! We still do it every year-we just wait till almost Halloween when we get together.      This is another sketch from Sketchabilities #29- I just love there sketches you should take a look at there blog for great ideas. I usedmisc. fall color papers, Autumn Leaves Postmark stamps, Hero Arts stamps, pop dots, circle & border punches, black and brown inks, and orange sequions and a black marker for journaling.

Homecoming- Cheryl's

I tried something different in this layout- I used some decorate acetate and cut it as a frame for the 3 photos, since the background on the photo's was kinda dark and plain. The screen print was by Mamby in gold, K&Company papers, chipboard painted and then stamped with black ink and then gold glitter painted over that. Title "Homecoming is handwritten with black marker, silk flowers with Stickles "gold" gliiter in the center of flowers, Fiskar circle cutter for the 4 circles that I also stamped the word friends  several times and painted gold glitter paint over the top. Made a journal tag and used several inks-gold, black ans sky blue throught the layout.  This is a sketch from Sketchabilities #28- and I had fun doing this layout.

This is my second born daughter at her Homecoming in 2002. She decided on this gold/tan dress for the dance-which matches her hair color-but doesn't stand out to much with her fair skin color. But she look beautiful as always...

Friday, September 17

Welcome to Frugal Fridays week #20

     As you can see I have several misc. cards scattered here in front of a hand painted box that I made to put all these journaling/tag cards into. Once in awhile when I'm in the mood to organize-which is alot I will go to my scraps and just start making small  gift tags or journaling spots with all the scrap papers that I have then I file them into this box and when I need a gift tag or journaling card/spot - they will be  handy. I like to use extra embellishments that I have one hand  that I didn't use the whole set of or extra sticker letters- like the weird letters x, y, z's, buttons or use some punches for flowers and add some stickles to give it a little pop. I feel like I'm not wasting anything and putting it all to good use for some future projects or gift tags are great to have laying around.
      I remember when my children were younger I would put a little note in their lunches once in awhile- this would be great for those little love notes to share with someone in your family or a co-worker, or friend.  So don't throw anything away- is my motto- you never know when you could use it for something. Well have fun scrapping and get out those scraps and make some little tags- there kinda fun to do at the same time. See ya next week and I should have some new blog candy on display for another lucky winner.

Thursday, September 16

Whos's Who?

This is a take from this weeks sketch over at Sketchabilities #26- which was a fun layout to work with I think I will be doing another layout sometime in the future with this sketch. I used Basic Grey papers, felt flowers, buttons, thread for paper piercing and hand stitching the leaves, swirls around the photo border, cut outs from Imaginisce papers, stickles, sticker letters, black marker and pop dots. Since I have a few buttons on this page I will be applying this layout also at Practical Scrappers this week.
 These photos are of my cousin and her twin girls Kaylin and Aubrey (not sure which one is which)-I have the hardest time telling them apart unless she dresses them in different clothes and then I have to remember that. This was taken over the fourth of July weekend in Michigan back in 2002-when the girls were quiet and shy and only 2 years old.

Wednesday, September 15

Bridal Shower for (Cheryl's book)

This layout is for the challenge over at Paper Poppy Kit to use 3 different edges  (anything but straight) which was kinda fun to do -something different and makes for an interesting layout. And you had a sketch to follow also so here is my take on this challenge .
I used several papers from Me&My Big Ideas paper stack, pink cardstock, white cardstock for flags celadon blue ink, torn edges, scalloped edges, some pink and brown fibers, silk flowers, brads, stickles, rubber letter stamp set with brown ink, and some white curling gift ribbon.

Step-Sister in law for (Cheryls book)

Yes kinda the same pictures but a different layout for my other daughter's scrapbook. This is a sketch from Practical Scrappers Sketch Friday this week. I used Me&My Big Ideas papers (3)pink carstock torn the edges, cut out some embellishments from the papers, celadon blue ink for edges,a pink and brown fiber (yarn) silk flowers, brads, stickles, rubber stamp letter set-black ink, and white curling ribbon.

Tuesday, September 14

First Time " Skiing"

I had fun with this sketch from Sketches in Thyme this week. I used several different papers from Pebbles, K&Company and DCWV, blue inks,marker for journaling, cut outs from papers and stickles on the waves, and Fiskars circle cutter. Also used preprinted chipboard letters which I added a gloss accent mendium on top.

Monday, September 13

SOLD- our old home in Wadsworth, Il back in 2002

This layout brought back some good and not so good memories. I just loved this house-my ex and I built this home in 1991 and I raised my 4 children here for several years as as single mom-so when it came time to move on and sell this place it was a hard thing to do back in 2002. So the phrase in the bottom right hand corner is the saying we had on a sign in the front porch "The House that Milt built". So with that I am entering this layout over at Frosted Designs for a saying or quote on your layout. Also over at Practical Scrappers this week for the use of buttons on your layout/project. I have not journaled on this page yet because it is a page for my son and I want him to tell me his thoughts about that day we moved out. I used several papers from K&Company paper stack, inked and sanded some edges, scalloped punched for the floral embellishments added threaded buttons and stickles, and some blue shiny chipboard letters for SOLD.

Sunday, September 12

Liz's Bridal Shower

This is my take for Sketchabilities #24 this week. I made a two page layout with a page that I did for Sketch Friday last week of my step-daughters bridal shower back in 2002. I used Me and My Big Ideas  several papers from the stack, embellishments were cut out from papers on a glass cutting mat with exacto knife, stickles and brown ink and the Cricut cartridges used were Gypsy Font and Tie The Knot.

Brian 6th grade

Here is my take for the sketch over at Sketchabilities #23 this week. I had one more picture to scrap for 2001 pictures, which I have 5 albums I'm working on for my kids all at the same time- so chronilogically is working for me. So this sketch was perfect for the one photo I had to finish of my son's 6th grade school picture.. I just didn't want to put flowers on it-so instead I found these owls on Adorn It papers and cut them out and punched several scalloped circles from white cardstock and attached them and used markers for some doodling on the edges of them. Used some white pre cut letters for the title and some great school worded papers I found in my stash along with blue cardstock. I also wrote on the matt (which is to look like a chalkboard) in white gel pen for my journaling spot. It was a pretty simple-yet fun page to do for my son.

Friday, September 10

Welcome to Frugal Fridays week #19

I thought I'd talk about more organizing again this week, since I have been doing some more of that in my scrapbook area in the past few weeks. Quite a few years ago when I was really into the craft of painting (I painted anything that didn't move)-mostly wooden projects.and lots of misc ornaments, I collected many bottles of acrylic paints. And when it became overwhelming I started to organize them into shoe boxes and that became to many boxes, then I ran across this paint storage organizer at Michael's and had to have it. I can't remember the exact price, but I used there 40% coupon I'm sure or bought it when it was on sale and paid about $!9.00 for it. Another one of those great storage deals and I have used it every since.
This paint rack is on a revolving base so it spins and holds 80 bottles on each side so a total of 160 containers-That's a lot of paint. Each section where a bottle rests is 1 1/2" x 1 1/2' so you could also put bottles of spray mists- stickles, glues, glitter bottles- all kinds of misc items could be stored  in these compartments (which  I might get another rack to do this with). As you can see I have kinda organized my bottles in color sections to make it easier to find and compare colors when I need them.

And as far as my painting supplies like brushes I put them in this lazy susan organizer which has several different sized compartments on a shelf in my cabinet , so I can grab this when I need  to do some painting, 
chalking or stenciling on my layouts or altered projects. You can find this organizer in Walmart-also Pampered Chef has one (expensive) and I believe Tupperware sells something similar to this also (which has a lifetime guarantee). This lazy Susan container is great to have at your work station/table with all your handy tools and supplies to do your every day layouts, also great to store markers and pens in-your name it this would help out in any craftroom.Well thanks for stopping by my Frugal Fridays and see you again next week. Enjoy the last few weeks of summer.

Thursday, September 9

So Excited!

This is my daughter in law at her bridal shower back in 2002-she was trying on her dress and showing us because they were getting married in Hawaii and most of us were not attending it was just the 2 of them. The picture is not the greatest, but it tells the story that day. This sketch is for Sketchy Fridays at Practical Scrappers
.Materials used: Me and My Big Ideas paper stack, embellishments cut from designed papers, stickles in several colors, brown ink and Gypsy Font and Tie the Knot Cricut cartridges on the letters and umbrella.

Tuesday, September 7

Together/Family

Hope everyone had a wonderful Labor Day weekend-I did and enjoyed the great weather outdoors for 3 days, so I didn't get to much scrapping done. But, I did manage to do 3 pages for some challenges this week. And this layout is for  Sketches in Thyme.

Materials used:  K&Company designer papers, Fiskars circle cutter, rubber stamp- butterfly, stickles " cotton candy", Want 2 scrap -pearls, brown ink and pen, vellum sheet(behind photo) and diecut scalloped circle & heart by Webster pages, pre made word tags by K&Company.

Black and White Photo of Eric on Motorcyle

Even tho it was Labor Day weekend I managed to find a little time this weekend to do a few layouts. So this one is for Sketchy Thursdays-it seem like an easy layout to do. This is my DS on my uncle's motorcycle back in 2001 during the summer in Michigan. I really like this one cause I like to work with black and white photo's once in awhile. I used several 2 sided  K&Company designer papers "daydreams", circle punch, white glossy cardstock, expoxy dots in green and yellow, and black ink.

Take me out to the Ball game

This fun colorful page is for the challenge at Ella's Pink Scrapbook #23. The challenge was a really easy one to do this week -use your favorite colors and embellishments on a layout. So with that I used some bright cheery colors in pink, blue and green, and torn some of the edges. For the embellishments I like to use and make my own-so I cut out some pictures from designers papers and used stickles, which is my favorite item to use on my pages. I used My Little shoebox designer papers, stickles, K&Company papers and a black marker and some brown ink. I cut the flags and the snail and tree from My Little shoebox papers, made my own journal tag to look like a baseball and added some corners to the border and pictures.

Friday, September 3

Welcome to Frugal Fridays #18

     Wow, its September already the month of August just flew by. All the kids are back in school and fall is just around the corner, I love the fall season. I also went back to work after a nice summer vacation from my part-time job as a school bus driver. But I have not yet got back into a new routine-I'm working on that. And its that time of year to get back into scrapbooking for many, after taking time for all the family activites and vacations.
     So this Frugal Friday I'm talking about all the miscellaneous items that you could possibly use on your projects that you might not normally think about. Such as index cards-which made great journaling spots-or use the colored index cards with your punches. Doilies that you might find in the bottom of your drawers-they make great backgrounds or use as borders on layouts, you can spray them with mists, glitter or stain them, or use floral punches on them and put in layers they make great flowers for an embellishment.Another item that you have laying around that you never thought of using are COFFEE filters-yes I said filters. Use your floral punches and layer them and attach a brad in the center (makes a great embellishments) you can then spray mist them-glitter or inks work great also. Give it a try you will be surprised how nice they turn out.

My favorite thing is paint chips- for years I have always grab a few from the hardware-paint stores  for future use for something-I wasn't sure what I was going to do with them. Now I use them  for my scrapbook layouts and more often for my cards. There is such a variety of colors out there- they are great for making my little embellishments from punches, flowers, borders, and tags. I like to find the big chips with no writing on them they are just right to fold  in half and make small cards out of- and if there is some writing on them I just cover them up with a strip of paper or add an embellishment to cover it. As you can see I have even found some in the shape of Mickey Mouse-this was a great find-perfect for those vacation scrapbook pages to Walt Disney World.
I just put all these items together in a shoebox and put a label on the side and store it in my cabinet, so its easy to grab when making some embellishments. And I still go over to the paint section every time and grab a few more paint chips in a variety of colors and to replace the colors I use alot when I go to the hardware stores and add to my collection- I keep it stocked as you might say. Well these little tips today can save you some money and I always enjoy making a few of my own embellishments-its creative and fun, so I hope you find some time to create and have fun too. Well I'm looking forward to this coming weekend, I have Monday off-like most of you- so enjoy this Labor Day weekend and I'll be seeing you again next week.

Thursday, September 2

Kisses, Kisses &more Kisses

Here is another layout of my sweeties( my Eskies) for the sketch over at SassylilSketches this week.I used paper pizazz (lips), DCWV (xoxox) paper and some purple and black cardstock, and other misc valentines papers, inked all edges in black, used purple and diamond Stickles, red heart rhinestones, and Cricut cartridges Plantin Schoolbook and Doodlecharms for the words and hearts.