CLICK HERE FOR FREE BLOGGER TEMPLATES, LINK BUTTONS AND MORE! »

Tuesday, August 28

Belly Up...

Here is a fun layout I did of all the guys in the pool ( swim up bar) while in Jamaica. I titled it appropriately belly up....and then a pic of my two daughters. I was just going thru my stash and pulled out anything that was colorful or looked like waves/water. and this is what I found and came up with. I wanted it to be very colorful and festive- so  as you can see all the glitter and stickles added to everything. I hand cut alot of the papers and layered them on and attached some circles, which I punched out for a border between the top and bottom pictures. I even put glitter on the felt alphas.

Monday, August 27

For little Harper

I had to make something handmade for the arrival of my 2nd cousin and this is what I came up with . I used plenty of Chipboard on this project, which I will be entering at Frosted Designs chipboard challenge this week.
 I cut out 6 honeycomb shapes from the chipboard and then covered them with papers that I found in green & pink tones. I also cut out white honeycomb shapes to attached the Cricut cut letters to spell out HARPER. Once, I did all that I added embellies flowers-etc on each letter, some of the embellishments are chipboard which I painted to the colors I needed and then wrote some stats on them such as birth weight time date etc. I then attached each honeycomb shape on the back and then added some ribbon to top and bottom. So now the new proud parents can hang it in the baby's room or even on the door.

Here is a close-up of half of the hanging name banner and of course I handmade a card to go along with this little gift using all the scraps leftover from the project -so it all matched real well

Saturday, August 25

Melting Crayons- not just for kids!

This was alot of fun and different- put you could do this technique to almost anything including a layout or card. So I thought I would tell you how I did this and give you a few tips on this project of mine.
     Melting Crayons- something we probably all did at one time or another when we were younger- I know I did and  enjoyed it then, also.
     I first went to my supply cabinet and pulled out the crayon box- which you could also go get these at any store for a really cheap price (and now that schol supplies are on sale- you should stock up). Then I choose the colors which I wanted to melt on my project- which happens to be greens. I then used masking tape/painter's tape green and taped then together in the order I wanted them to be.
I already prepainted my cardoard letters in a lime green ahead of time. and got my heat gun out and a old cricut cutting sheet as my counter cover for spills- and I was ready to turn that heat gun on and melt away.
As, I was holding the crayons- I realized I forgot to tell you to put something like a popsicle stick or emory board taped behind the crayons for support. I started to melt the crayons from the top of the letters- but then thought I would lay the letters down and melt everywhere I liked the look better. I also did the back and sides of the 3-D letters first. It doesn't take very long at all for the wax to dry- but, then again if you dont like the look -you just reheat that area and/or redrip the crayons..very easy and so much fun to be creative... and here is my finished project which I'm thinking about putting in my newly painted kitchen- which of course is done in a greens. Just in case you were wondering the D B  are my initials. Well thanks for stopping by and I hope you try to melt some crayons on some project- lets be a kid again- its fun.

Thursday, August 23

The Views..in Jamaica

 I scrapped some of the pictures  of all the lovely views of the resort and here is a 2-page layout I did .
I painted with white acryoic around the photos and used some older papers that I had in my stash from years ago by My Angel Company, ribbons, metal brackets, cricut cuts and some felt alpha stickers which I also painted on them too. I found some travel stamps and placed them all over the background papers

Wednesday, August 22

Just because...

I took a few pictures while in Jamaica of some of the colors/flowers that were around my villa when I was down there in April and then thought - lets do a layout of these beautiful photos and here is what I came up with.Oh yeah one caterpillar picture..it was so cool looking and very colorful.

Tuesday, August 21

Breath taking...

I just love this- but it might be because she's my daughter and she was breath taking that day !!! I wanted this pictures to be the main focus of these spectacular pictures (and I even took them) The paper that I used  was in my stash which was from several years ago- inked in brown and put on green cardstock. I then used 2 rectangle doilies -which happen to be just the right size for these two photo's. I did a Cricut cut for the title and covered with Stickles and added a white satin polka dot ribbon underneath the title words. Simple yet elegant- that is what I wanted to create with this page.

Monday, August 20

another vinyl cut for kitchen..

Here is another vinyl cut project I did for my kitchen the other day..it turned out- ok. It was kinda hard to line up the words correctly- plus, I didnt use transfer paper, because I had all the owrds scattered on the vinyl to save space. Maybe this was not the best idea..but its up and will have to do. I like the saying tho:  The fondest memories are made around the kitchen table."
I used several cartridges for the saying Jasmine for most of them , From My kitchen,  andWild Card

Sunday, August 19

The Bridal Party-2pg

I just love how these two pages makes it look like they are walking down the isle- just like in Jamaica at my daughter's wedding. I have been working on this book since June and I'm trying to stay and work with certain colors and papers. I have accomplished about 50 pages so far and have about 50 more to go.
I used papers by K&Company which had all the colors I wanted to represent and a large border punch added some bright yellow ribbon and  flowers I made with white paper bags and a brad center then did the title with a Cricut cut. I will be applying this over at Sketches in Thyme for their challenge #88 - a 2 page sketch.

Friday, August 17

My Family... My Inspiration....

I just did this project this past weekend to decorate my foyer area..and I used my Cricut and did vinyl cuts using the Calligraphy cartridge and Accent Essentials. I really like how this turned out and it was pretty simple to do...once I figured out my layout of everything on the wall space.
These photos were all taken at the wedding in Jamaica and I printed 5 x 7 of all my favorite ones of the family. And this is my newly painted foyer wall color of Grey Violet- love it  love it!

Thursday, August 16

6 layouts in 1 project

    This project was  thought up at the last minute when I wanted to hang the doors off a curio cabinet on my walls, instead of using the typical picture frames for my family pictures. I took the 2 doors off an old curio cabinet, which I repainted and they're in my craft room (without the doors) and knew I could use the doors somehow and this is what I came up with.I hung them horizontally and left the door handles on                                      (heavy on the pics=7)
 I did 6 individual layouts-using all the same papers and embellies and gave each one a different look with subtitles. K&Company papers, butterfly punch by Martha Stewart, Cricut cuts for bird cage, titles, leaf, sprigs, misc embellies of flowers, tags, journal spots, and stickles. I did not permantely attached the photos- that way I can change them in the future- so, I just put a 5 x 7 white matted area for the picture to fit. I just purchased this paper Stack by K&Company and just love all the designs and colors-perfect for my decor in my home.
 Of course, I had to find a pic of Izzy she is family too!
 I wanted pictures of just my kids in these layouts - so I searched thru my computer and found a few special ones - this was taken in Jamaica when my 4 kids all arrived from all over the states for their sisters wedding this past April. They all grow up so fast!
 And of course their is Jenna- who we all love also....
 This was taken back in 2007 when we all went to Michigan for the fourth of July and we stopped at Daves Falls in Wisc.- something I used to do with them as kids and we haven't been able to get together in years so this was special.
 I don't like my picture taken I'm usually behind the camera- but I thought I should have one pic of me since I'm the head of the family so this was taken a few years back when I went to Las Vegas( i love to visit this place) so this was just perfect for this frame of  pictures.
And the last one is of the 4 again -Christmas 2007 the last time they were all together for that holiday. They just have so much fun when all together--" Birds of a feather stick Together" is the sub title for this page.
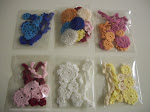
Wednesday, August 15

Memories....

I just love this tile board that I had bought several years ago and wasn't sure what I was gonna do with it...so it was great to find this now and make this wonderful project for my new decorated home in these colors.
    I painted the board in "mississippi mud" acrylic paint, then choose my 3 papers and cut them in 4 x 4 squares and inked the edges. Found some stamps that had all kinds of great Memory sayings and placed them in an order that looked well on the tile board. Then decoupaged them on and this was a project finished in under 3 hours and I just Love it!!!  I bought an easel at HL for 1/2 off and now this too is in my kitchen area.

Tuesday, August 14

redecorating and painting

     I have been so-so busy this summer with repainting every room in the first level of my home and also making projects and decorating all the rooms..so I havent been spending alot of time on layouts- but other projects which I can't wait to show you in my new few days of posts.
     Here is one project that I did for my kitchen area- which I found this piece at a garage sale for $3.00 and repurposed it into a clock. I repainted it in a dabby grey, rechalked the chalboard area and then found scrapbook paper that was the colors and design I wanted for the background of the clock area. I used sticker alpha/numbers and inked the edges and handcut the ferns out and placed in the corners and who-lah a very nice piece of wall art for my home.