CLICK HERE FOR FREE BLOGGER TEMPLATES, LINK BUTTONS AND MORE! »

Monday, December 24

On the 8th Day of Christmas

Brands or products is the challenge for the 8th day of Christmas over at Frosted Designs...this one was a bit hard to do-but I managed and now I cant find my notes that I made of all the different brands and products..but as you can see they are all her in this 2 page fall layout I did for a friend.
If I can remember- I used several papers from different paper stacks that had all the fall colors I was looking for, several different sticker embellies from my old stash, brazzil cardstock, stickles, chalks, stamps, inks, markers, punch for sub titles, vellum quotes/sayings..that should cover it all the different products/brands used in this layout for the challenge. I know I will find my notes in the next few days  lol

Saturday, December 22

12 Days of Christmas at Frosted Designs

For the 11th day of Christmas I have banner/flags for the challenge over at Frosted Designs. I know its a 4th of July page, but that's what I'm working on now in my 2008 photos for all 4 of my childrens scrapbooks.
I used a banner/flag stamp and used my stash /scrap papers that were colors of red white and blue.

Button Buttons I have 10 Buttons

The 12 Days of Christmas challenge over at Frosted Designs is to use at least 10 buttons on a project and that I did of this Retirement Party layout- I threw for a co-worker back in 2008.
The title of this page is "The Candy Man"  Mr.Noel was known for giving out lots of candy to his students and the staff on a daily basis for 25 years...wow. I have yet to journal on this page-but enjoyed dedicating a layout toward him since he has since past away.

Friday, December 21

Pearls & sparkles for Frosted Designs

I used several different colored pearls (11) for Frosted Designs 12 Days of Christmas Challenge. On a simply black & white design paper background I added the matted photo and then added some silk flowers and some ribbon/lace flowers that I made with the pearls in the center of them

Thursday, December 13

5 gold items for 12 days of Christmas

I used 5 gold brads on this layout for my son's scrapbook (hard to see - 1 on top right corner 1 on lower left corner and 3 on lower right corner) I will be applying this for the 12 days of Christmas Challenge over at Frosted Designs.

Wednesday, December 12

4-papers for 12 Days of Christmas

Here is my project/layout for the 12 days of Christmas Challenge over at Frosted Designs to use 4 or more papers. Which I used several more than 4- but the banner I used 5 different paper scraps and the background I used 3 different papers to complete this forth of July layout for my daughter's book

Tuesday, December 11

Frosted Designs 12 Days of Christmas

Here is my take for the 12 Days of Christmas challenge at Frosted Designs to use 3 mist/inks/paints on a project. So this page is a layout of the wedding invitations that I made (102 invites) which I used several colored inks on the stamps ( 3-bees and hive) and all the edges of all the invites and for the background of this page I misted honeycomb shapes- since this was the theme of the reception "Meant to Bee"

Monday, December 10

2 stamps for 12 Days of Christmas

Here is my take on the project to use 2 stamps for the Frosted Designs 12 Days of Christmas challenge. I stamped the large sunflower and then colored in with markers and added some stickles and fluff to the center then I stamped several mason jars and cut them out which I will eventually journal on them to decscribe all the handmade details and decor that I made for my daughter's reception- which is what these photos are taken of to add to my book of projects that I have done.

Friday, December 7

Is an Owl considered a bird?


Here is my take for the 12 days of Christmas over at Frosted Designs blog..not sure if an Owl is a bird but if not there are 2 birds on the tree branch in the background of this page.  I used several papers from my stash and tore the edges and layered them then added a Mambly acetate sheet ove the top of it which has the owl and birds on them. I then placed some chalk colored areas behind the owl to make it stand out more and some cut out moths from some designer papers added the brads in the corners to attached the acetate sheet to page

Thursday, December 6

Awww..so cute

This is a page of my daughter with her sister's brand new little kitten which we were watching for a week back in 2008. His name is Oliver and he was only 4 weeks old at the time. Aww so cute. I will be applying this over  at Let's Capture these Sketches for the sketch challenge this week #160. I love this sketch will be using this again for sure!

Wednesday, December 5

2's company

This is my take on the 5 button challenge over at Frosted Designs this week-even tho I have 6 buttons- I hope I get it posted on time. This another page done of my favorite two gals Jenna and Izzy which is going to go in one of my kids scrapbooks.
all papaers are from my stash and were scraps that I either punched out scalloped circles of tags or used my Cricut to cut out the bones and paws from. I tied twine around the picture and added buttons to the center of the punches and inked all the edges

Tuesday, December 4

Cliff Jumping into Lake Superior

A two page layout for my books- a variety of pictures of my kids enjoying Presque Isle in Marquette Michigan during the week of Forth of July in 2008. A tradition we do every year we go up there. But today they decided they were gonna do some cliff jumping into the cool waters of Lake Superior.
I used little yellow bicycle papers  and laser cut sclloped cirle in the middle of the two pages, stamp brown branches added a few leaves and cut my own water spouts and added glitter to them. A few journal tags- which I need to yet do and used a floral punch on one of the pictures with the close-up pic of my daughters.

Monday, December 3

Handmade Bird Nest.

 When I saw these papers awhile back I knew I had to get a few- just love the design and colors from recollections "bird nest" as my background which I tore the edges and then from Memory Box paper I hand cut out some branches and layered them in the corners of the page. three Martha Stewart butterfly punch with rhinestones and matted the 3 pictures
But what I like the best is the bird's nest I made...by cutting fine strips of brown paper which had a slight striped pattern on and the laying them down to look like a nest. I then cut out of blue cardstock 4 little eggs (to represent my 4 little birdies) which I inked and hand drew to look little little robin eggs and pop dotted them onto the nest I love it...I just wish I had taken better pictures- they're kinda dark.

Sunday, December 2

Three pages for three different books

I did three pages for 3 different books using all the same papers and ideas and mostly the same pictures in under 3 hours- this was great. They are misc. pics from my cousins wedding we attended  and I wanted each of the three children to have a page for their books.
 I made alot of my own embellies such as the flowers on the top page from paper towels ( which I already had made and was in my stash) and the journal tags and added some tulip paint for flourishes.
 This page for my son I punched the flowers and hand cut all the green leaves and inked them in 3 colors of green and again did the tulip paint for flourishes
And the last page I did the flowers from paper towels and flourishes but added some cream paint as borders on all the pictures. I used papers from DCWV "Once upon a time" stack which had the purple colors I needed to pull out the colors of the clothing- to try to pull all these misc pictures together.

Saturday, December 1

Fun on Bass Lake

Wow- I really cut up these pictures- but like how it turned out.  I found some simply blue patterned background paper by DCWV- used white for mats and then just cut all the pictures evenly divided into three pieces. Then I had two pictures that I did not cut at all.
 I used my cartridge Life's a Beach for the waves and the lifesavers and added Stickles to them and did alittle journaling on the waves- very simple yet this page really stands out for my daughter's scrapbook.

Friday, November 30

Our favorite spot...Picnic Table

Yes another layout of my girls- Jenna and Izzy..I just adore them -they're just so cute.They have their favorite spot when they go outside in the back- the Picnic table . So I had to scrap this page- it took me awhile to find the right cartridge that had this picnic table while I was at a retreat and one of the other scrappers found this for me- not sure which one it was tho- but she said it was an older one. I also used  My Community and Ashley's alphabet cartridges.
I took white paint and painted around the border of the page and also the three areas which I wrote their names and date on. The background paper is from Reminisce (tree paper) and chalked the trees  and some alpha stickers for the title on the bottom.

Wednesday, November 21

2 page layout of Dave's falls

While at my scrapbooking retreat a month ago I did another 47 pages for my childrens scrapbooks and this 2-pager was just one of the many that I did with same pictures ( one for each of the 5 books I do)  and this one is for my book. and it was my favorite one.
It was a family weekend trip to Michigan and I finally was able to get all the kids together to go for the 4th of july celebration. But on our way up we stopped at Dave's Falls in upper Wisconsin and did some sightseeing and picture taking- for the scrapbooks of course!
Supplies used: SEI floral pattern -embossed,  Best Creations-acetate on both sides over green paper. Dark & light grey- double matting, K&Company borders, Martha Stewart butterfly punch, handmade flowers (out of paper towels) rhinestones, Stickles, 8 gem stone brads, journal tags, and misc. chipboard embellies. Here are close-ups of each page. One of the journaling tags is inserted into a pocket

Tuesday, November 20

The Doors in Marquette Michigan

I just loved how I did this page- it brings back so many great memories for me. Back in 007 and 2008 when I visited Marquette Michigan for the forth of July celebrations- they had this event down on lake Superior that anyone could do- it was to paint a door and then have it on display for the moth of July at Marquette Harbor. So of course being creative as I am I did it both years. The first door was the Blue dream door- on one side I painted several words Dream- reach for the stars- Believe- Achieve and Succeed and on the other side were the same words but in Finnish (which are the bottom two pictures)
   Then, the next year they had a theme you were to follow and it had to relate to Grandma's...this was just so perfect for our family - since my grandmother had just passed away earlier that year- so that's what I dedicated my door too. I painted it blue (finnish colors) and painted her name in white and added a large photo of her in her younger days. Then, added wooden stars that I painted Yellow with all the grandchildren and great grandchildren names on each of them total I believe at the time was like 42- On the other side of the door I had made up signs or written saying that my grandmother use to say to all of us and scattered them all over with items that brought her joy- like daises, flowers, misc pictures of the family...very memorable it was and I was glad to have done it and have it on display in Marquette Michigan for over a month that year.  Others in the picture were family that helped me get this project done in the short time we had- they were running around getting me supplies and also helping me with the door- it was a family affair. So this was a simple layout- but it is full of wonderful and great memories- I overlook the simplicity of this layout and still love it.

Monday, November 19

I love working with Fall colors and theme

 Here is a layout of one of my precious dogs- IZZY outside after I put up some fall decorations in the front yard. I will also be applying this layout over at Frosted Designs color challenge this week.
 I used misc papers with the fall colors and tore the edges, matted the pics with white cardstock and then stamped lots of leaves onto a designer paper that had fall colored leaves printed on- so all I had to do was cut them out and put on page they already have all the different colors on them. Stamped and cut the pumpkins and of course addedd some glitter/Stickles. Found some fall silk flowers in my stash and added alpha stickers for the Izzy title. And last I found the cute little scraecrow Jolee's sticker and had to put that right in the middle along with a few cornstalks.

Saturday, November 10

Frosted Designs Fall Blog Hop LAYOUT

OMG..I had a blast doing this layout tonight after I read each of the Designers blogs at  Frosted Design Fall Blog Hop to get all the ingredients to participate in the challenge. There are 12 ingredients to choose 6 from to do a project and I choose to do a layout and I used all 12 ingredients in my layout-- WOW.
My project also has the Fall theme....pictures taken a few weeks ago of my fall decorated front yard, which I had fun painting on all the pumpkins, too!
 A list of the 12  ingredients and how I incorporated them into my layout:
1. Embossing: dry embossed the mats and the leaves with my Cuttlebug/folders
2. Buttons: 5 orange buttons with floss tied on and painted dots in black & white
3. Die-cuts: Used Straight from the Nest cartridge to cut out many fall leaves and embossed and inked
4. Stickles/ Glitter: I used both glitter paper / Stickles in orange on the pumpkins and leaves in bronze
5. Spray Mists: I used Tiger Lily and Oriental Poppy Tattered Angel Mists on the pumpkins with yellow cardstock
6. Alphabet Stickers: The title "My Fall Yard- Autumn Greetings &  There is a Chill in the Air"
7. Fall Leaves:  Die cut leaves that are embossed and inked in gold and bronze glitter-scattered on page
8. Stamping: I stamped the pumpkins with a rubber stamp in black ink and then cut out and pop dotted for a 3-D effect
9. Rhinestones/gems:  I used purple rhinestones for the center of my flowers
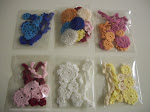
10. Flowers: I hand crocheted  six of the maroon flowers
11. Lace: I also hand crocheted the maroon lace on top half of page
12. Pumpkins: I stamped 3 pumpkins and cut out

Here are a few close-ups of the layout: I used all papers by DCWV-The Natural Stack- great for fall projects. I also inked the edges of all the papers in black or dark brown, scrapper's floss was tied on the buttons and the H O M E  letters on side of page and curled, I also painted a faux stitched border all around the 12 x 12 paper and then painted a thin white mat look on the pictures to make them pop a bit more. The little house and tree was from my stash of embellies that I never throw away anything you never know when you can use something. I completed this project tonight in under 3 hours- after I did the blog hop and got lots of inspiration from designers- it made my Friday night! 
    Thanks ladies for all wonderful ideas and the hop- also some of the designers have an additional surprise of goodies to enter to win- so be sure to go check them all out. Anita is one of them who has a wonderful pile of goodies to a lucky winner, - I would love to be picked for this!

Wednesday, October 31

Happy Halloween...

HAPPY HALLOWEEN from my house to YOURS... I was busy a few weeks ago decorating my front yard with pumpkins -scarecrows and mums and decided on painting some pumpkins instead of carving them and this is what I did to a few .
 These are out in front by the driveway with my house number painted on them- so cute.
 And why not do a chevron pattern on a white pumpkin and my initials with a polka dot pumpkin by my front door entrance with some beautiful magenta colored mums in full bloom.
 Then I spray painted these in silver, black and white and added tulip paint dots sprinkled with glitter-to use as a centerpiece on kitchen table . I just love the bling on these.
And one last pumpkin on my kitchen counter, which will look great for after Halloween into the month of November is my "Thanks" pumpkin with some raffia tied on the top and a few silk flowers. So thanks for taking a  look at some projects that have been keeping me busy with my crafts. Enjoy the holiday and Trick or Treat with the kiddies.

Friday, October 19

CRAZY LOVE

Crazy Love- is probably one of my favorite layouts I did this past weekend..and my daughter(the bride) came to visit me at the retreat and she just loved it!!! So I think I will be putting this page into a frame and giving it to them to display in their home.
With this layout I did not stick to the "Meant to Bee" theme or colors that I have been using in all the other layouts. Since the background was the red barn door- I thought I'd use this color in my papers and when I saw this crazy love paper a few months back I knew I would be using it somehow. But I did manage to add some burlap  into the title of You & Me banner (heart punched and faux stitching) and attached them with some black letter brads in my stash. Used a black a white diagonal paper, which I then colored in the red areas with marker and added a premade cutout ADORE with some heart brads and double matted the pictures. Once again- I really enjoyed working with this layout and like the simplicity of it. But, I want to put this in my scrapbook!

Thursday, October 18

Half and Half...

Two Black and white and Two colored pictures make this a great layout. Simply added black or white mats to the photos and some pre-made cut out word tags -on a small pattern print yellow background paper. I also added a few stamped bees and some scrap papers punched on the side for a border. And then drew my little beehive for the bottom corner..Simple and I like it.

Wednesday, October 17

Too Sexy for your Love

This page received  lots of attention at the retreat this past weekend by all the ladies...I thought it was because of the misting/masking background I did with the honeycomb shapes...but NO it was the pictures that all the ladies were admiring --too funny!
I used my cricut to cut out previously honeycomb shapes and decided to keep the left over sheet for some future use- so this weekend I used the sheet as my mask and sprayed with coffee(tattered angel spray mist) onto the background and yellow cardstock. I then added the flower ribbon (which was leftovers from the garter belt I made) and a few other embellies like the mason jar cut out and the butterfly and piece of burlap. I simply matted the pics in white cardstock and put them in the order that they were taken to tell a story... What a story this is.. and got the title from the song that was being played at this time. I should of turned this page in for the layout contest- it would of won- probably hands done- just because of the subject matter- not the creativeness of the page..Too funny! Well I hope you enjoyed this page as much as the ladies did this weekend...my daughter saw this page and she really liked it- and said her hubby looks great with this hat on.

Tuesday, October 16

tornado warning at retreat- wow

Well what any eventful retreat this was...I only got 37 fabulous pages done- but had the best 70 minute massage ever, my daughter stopped by Friday evening at the retreat and spent the night visiting with me and my scrapbook buddies, and we had a tornado close by so we had to go into the lobby hallway for about 1/2 hour till the sirens went off...how exciting!! First time this has ever happened to me.
I worked on a few of the last pages for my daughter's barn wedding reception. Here is one of them- I really like how I incorporated all the elements from the decor of the barn- burlap, bees, sunflowers, and twine in all the pages somehow.

This page turned out great- The theme of the reception was "Meant to Bee" so I made a little mini banner for this page and clipped on with mini clothespins and stamped all the sunflowers and colored them in and then added brown fluff to the centers of the sunflowers and of course some stickles for some bling.
In this page I made my own burlap flowers and added some cute button brads and some twine- to keep the theme coninued in all the pages I used alot of the same papers and ink colors. Well thanks for stopping by and I will be posting all the pages that I worked on during this past weekend retreat in the next few weeks. I cant wait to go again in January.

Monday, October 15

Good Morning..its been a long weekend!

 Some misc pictures that I put together on one page for a friend of mine and just cut out the embellies from K&Company paper stack of flowers and used scrap papers I had in my stash that were colorful. One of the pages I did while at my retreat in September.
     Speaking of retreats that is where I was again this weekend...so right now I'm probably very tired (from no sleep) and unpacking all my supplies and reorganizing them in my craftroom downstairs..so in a few days I will tell you about the great time I had and post some layouts from the 3-day retreat.

Saturday, October 13

Another Scrapcabana Retreat..YEAH!!

     Once again, I'm packing up for another retreat at the ScrapCabana in Aurora, IL this weekend and looking forward to seeing /meeting friends. I have been preparing all the pages- I plan on doing this weekend (Fri-Sun) the past few days and my goal is 50 pages this time. One thing, I have learned about going to these retreats is to have all my photos and papers figured out ahead of time. Its to hard to bring all my papers with and way to heavy to carry them all...so a few weeks before I go to one of these retreats I layout out my photos and figure out what papers I will be using with them and jot my ideas on a notebook- to give me reference when I get there. So that way all I'm bringing ( which is still way to much) is the embellies that I could possible use and the tools needed to complete each page. Here is a photo of all my supplies that I will be bringing with me this time...can you imagine if I had to bring all the papers that I wanted to go thru for each of my pages..OMG
Well, I hope everyone finds some time this weekend to scrap a page or two....And I'll be posting alot of new layouts after this weekend and after I unpack everything!

Friday, October 12

The last of the Jamaican Wedding layouts....

    Finally,  I have finished the Jamaican wedding layouts..all 50 of them for this book. I also did a book for my Jamaican trip and now I'm starting the wedding /reception at the barn- to be posted in the weeks to come. This wedding sure has kept me very busy for the past year and lots of layouts to do.
 I love this page on top- I tried to make them look like postcards- so I did some rub-on sayings and just matted them in cream cardstock. I then cut out of designer paper the waves and little shells and boat. I then drew and painted in my own little foot steps in the sand and inked all the paper edges in brown.
And the very last page of this album will be this layout- since the first page is of my daughter when she had just got all dressed  (black and white photos). So I thought this would be great to save for the end. A very simple layout which I just love it. Well thanks for looking at all my layouts of my daughters wedding over the past few months- and there will be more coming - because she actually had two weddings one in Jamaica and one in the states- here in our home town a month later for all the relatives and friends to attend- spoiled brat (kids these days want it all!)  lol...well they are paying for it- so I can't complain and say to much about that.

Thursday, October 11

Beautiful pictures of the couple in Jamaica

   These last few layouts are pictures taken by the photographer and are just simply wonderful and I didnt want to take away from them and add alot of papers and embellies so I just cut out some seashells and clouds for this first layout and matted the pictures. I lined up the two pictures on the left horizontally with the sea line on the paper.

Same with these photos- I just simply matted and added alot of seashells and a few papers with border punched on the left side. If you take a close look at the photo on top right..the bouquet is in the sand with their handprints and they're actual rings in the sand- I thought this was such a cute photo.

Wednesday, October 10

Two of my favorite

I called these tow of my favorite- but I really like them all- hard to pick two - but these two stand out with me because I like to work with layouts of the outdoor natural looks and the color green like in this layout.
 I torn several papers and pulled out my crimper (i forget about that tool) and used the Martha Stewart butterfly punch -I just love this punch. and added a few silk flowers and chipboard alpha's for the title and matted the pictures in a thin white cardstock.
I finally found a page to use this great background paper - which I didnt have to figure out all different papers just this one. I then used my cricut to cut out the lamp posts (since that is what they are standing by and holding on to in the picture) and added alot of small yellow silk flowers and some of my handmade embellies of leaves and flourishes and 3 more punched butterflies.

Tuesday, October 9

First dance/Cutting the cake

 More layouts for my daughter's wedding in Jamaica- almost finished with this book 1 of 3 that I have been working on all summer. The top layout is really like because I saw this tutorial on making your own feathers- so I did. As you can see there are two feathers in the middle of this layout and I also added some butterfly cricut cutsand a birdcage. For the feathers I used some preprinted sheet music paper that I downloaded or printed off Pinterest- inked them in several inks and then glued  the paperclip in the middle of the two papers and then cut at an angle to feather it and they were down-very simple- will have to make more of these cute embellies for future layouts.
And here is a simple layout of them cutting the cake I used pre cut alphas for the title and a cricut cut for the cake from Tie the Knot and matted the two pictures in the middle to stand out more than the other two. Oh yeah-- this page has a sheet of vellum on top of a grey piece of cardstock