CLICK HERE FOR FREE BLOGGER TEMPLATES, LINK BUTTONS AND MORE! »

Saturday, August 27

Sous - sketch layout

Same Name...is my title for this layout of my son Eric and his friend Randy Fagan. While we were visiting Marquette Michigan a few years back- we noticed as we were driving down the main street a Store named Fagan's. We just had to stop and take a look and a photo outside the store- for Randy. I will be applying this layout over at Stuck on you Sketches for this fabulous sketch.
 I used a plain cardstock in dark green and used chalks to highlight the back a bit and then added a precut decorative paper that I cut up and laid out to my likings to fit the page and sketch (somewhat). Some large silk flowers that I added stickles and some glitter for the centers, gold alpha' letters for the title, my own flourishes with black puffy paints, a journal tag tied on with ribbon,
 A frame piece of chipboard inked and added to the top of a old dictionary page torn out and added the letters Fagan to the inside of the frame- to look like the frame in the store window. Other materials used, ribbon, decorative scissors, brads, inks, chalks, Zig writers , staples, an old stamp, pop dots and Yes paste.

Thursday, August 25

Reach for the Stars

Here is a take I did from the sketch over at Pencil Lines- not sure if I got it posted in time tho- but I will share it with all of you. I used My Mind's Eye paper "life stories" and sprayed with Tattered Angel Mist in the center using carmel apple and coffee shop -browns. I then stamped large stars around the circle area using stamps by Autumn Leaves.

I made my own banner that I used flag stamps by Hero Arts in two patterned papers and then cut out and stamped my title on them in black ink. The clouds I cut out of white cardstock and added Flower Soft in Ivory to them and attached them on the page. The Title reach for the Stars was a Cricut cut from the cartridge Jasmine.the ribbon was folded scrap paper and some punches were used to write on for the center of the ribbonette. Other materials used were pop dots, Yes paste, Stickles, punches, decorative scissors and twine for the banner.
In this layout I had two kids graduating in the same year- son from 8th grade and daughter from High School and within days of each other also- was a little hectic around this house back then in May of 2005, with graduations, parties and cleaning . I am so glad those days are past me I don't know if I would have the energy to do all that anymore...lol

Tuesday, August 23

My Favorite photo of ME...

Wow- my 6 months as a member of the Design Team here at Frosted Designs- Sketch Along Tuesdays flew by and I enjoyed working with all the sketches each month. But starting in September I have moved over to the Fabulous Fridays team and will be working with a great talented bunch of ladies for the next term. So I'm pretty excited about that-exploring more with some other projects instead of all layouts. Well, onto my layout here for my last sketch #22 by Karin for Sketch Along Tuesdays I just loved working with this one and I found my favorite photo of myself- which there are not to many of those in my stash of photos- so I saved this one for last and it worked so well with this sketch. I spent a little bit of time picking out papers for this one- I wanted the blue to really stand out in the picture.
                                  here is the take we worked with this week Sketch #22 below

I used most papers from K&Company Specialty papers stack and some cream cardstock and Creative Imaginations all inked with Studio G brown ink. I choose the blue background paper because it resembled the shirt I was wearing in the photo so well and really made the pic pop out against the little pattern papers I used. I added 2 ribbons on the bottom which I hand stitched the mother of pearls shells in blue and green too. Around one of the scalloped edges I pierced holes and then stitched in blue thread and added some clear beads to it for some bling.
I then made my own flourishes with black puffy paint and found some flowers from Prima and misc ones in my stash and added white 1/2 pearls to the center. A few cute little bumble bees from K&Company are buzzing around the page.
Made my own chipboard flag banner added some pape to the fronts and stamped with alpha letters by Studio G for my sub title and again added pearls in between each banner and a blue cord for hanging. I used some chipboard letters ( MY) inked them and tied on some thread and a few more embellies.
     Well, I want to thank you for stopping by and hope to continue seeing you and your projects posted at Frosted Designs in the months to come, and see what you create with this current sketch by the end of the month. They have fabulous sponsors from week to week and love all their challenges for you and I to work on to keep the creative minds going. Be sure to check out there new card challenge starting in Sept. along with Fabulous Fridays and Sketch Along Tuesdays -- click here. Frosted Designs

Thursday, August 18

IT"S Friday and I'm going Shopping...

Where you ask? at the SCRAPBOOK EXPO in St. Charles, Illinois. This is so exciting to me. I went there last year for the first time and I was overwhelmed with all the stuff they had there for us to look at, work with and purchase of course...and I did alot of that. Four hundred dollars later, I finally closed the place down...lol. So this has been an event on my calendar for a year and the day has finally arrived.
    I have my large leopard print tote bag on wheels all ready to go, along with my camera and a large note pad for jotting down all the wonderful ideas that I will see..and my comfy sneakers & scrapbooking t-shirt all laid out. It's about an hour and half away, so I will be up early and out the door by 7 am to arrive when the doors open at 9am. I have this feeling there will be a few scrapbookers waiting in line to get in..lol and even a few of them might be people that I have met on the blogs here online...I might run into Wendy C...
     I also have some other fabulous news- I have been choosen as a Design Team member for Frosted Designs- Fabulous Fridays...I was on the team for Sketch Along Tuesdays and switched over. I'm excited to work with such a great talented group of ladies at Frosted Designs- so I'm looking forward to creating other projects - than just layouts for the challenges coming up in the next six months. Looking forward to seeing your entries and I love your comments and I enjoy leaving comments for you- also. Well, wish me luck--hope I find a few items to buy at the EXPO!

Wednesday, August 17

Two-2 page layouts - 3 Challenges!

I was on a roll today- since I haven't been scrapping for 2 weeks- so I had alot of challenges in front of me to try to do and I did 2- two page layouts and they cover 3 challenges for this week and so I am posting them all here together since they are of our Trip a few years back to Las Vegas (2005) when we took a day trip into Red Rock Canyon.
This first 2-page layout is for Creative Scrappers #167 on left side.....and Sketchy Thursdays on the right side. I used all the same papers on both pages from my old stash- so not sure who they are by but they were from a super stack. I used some older alphabet titles from Artsy Collage and cut them out and put them on black cardstock with pop dots. I used my Cricut cartridge Mickey and Friends for the film strips used as mats for the photos and some rust colored cross stitch thread to make all my x'x's on each page. I journaled in a brown Zig writer and then used the little black squares from the film strip to write with a white gel pen for my sub titles- Las Vegas-Nevada ( which are hard to see in this photo) but there are so cute.
Above is a close-up of the left side for Creative Scrappers #167 sketch challenge.
and here is the right side for Sketchy Thursdays sketch Challenge

Then onto my next two-page layout which only one side( the right side) is for the challenge at Creative Scrappers #168. Again I used all the same papers and embellishments for all 4 pages. I also added some stamps by Stampendous, Autumn Leaves and Scrappy Cat, along with a journal tag stamp.
This layout is titled Mule Time..because as we were driving around in Red Rock Canyon several mules were taking up the road looking for handouts and they weren't taking no for an answer. Which you can see in the layout below- they are right next to the car.

The layout below is the sketch from Creative Scrappers #168 this week- which is a few photos of us in the Red Rock Canyon on a very hot hot day- temps were in the high 100's and the rocks were so hot you couldn't even pick them up and our shoes were melting to the pavement- so you didn't stay in one place to long... that's what I remember the most of this trip.

Tuesday, August 16

Sketches in Thyme #53

Well its been awhile since I have posted anything on my blog- have been on a 2 week vacation and now I'm back and ready to scrap. So, here is the first challenge I did today for Sketches in Thyme #53. I turned the sketch on its side so it would work better with my photo- and I kept all the elements the same in the layout- which worked out well. I used all K&Company Designer Stack papers , cream and black cardstock.
The triangle strip on the left side & the circle cut on the right is the front cover of the paper stack showing all the different papers in the set- but I cut it out as a strip and a circle and used that as the background paper- since the patterns were similar to the other papers I am using in this layout. I inked all the edges in coffee bean brown and added Thicker letters by American Crafts for my title "ERIC" and sub title I wrote around on the circle with black Zig writer.
I then found in my large stash of flowers some multi layered yellow flowers and some little silk blue flowers and scattered them on the page. I drew my own flourishes with black puffy paints and pop dotted some K&Company butterfly cut outs
I then got out some of my favorites embellishments to use -Stickles and added some bling to the flowers and the center of the butterflies- then last I folded up the one corner and added some dots and I finished my first layout in two weeks. It felt so good to be in my scrapbook room again.

Tuesday, August 9

Sketch Along Tuesdays #21

Keys to Sucess- is my D.T. take for the sketch over at Sketch Along Tuesdays at Frosted Designs designed by Karin Astacio. While this is being posted I am on a little vacation out in Las Vegas visitng my daughter (who is also in my layout this week) and doing a little bit of gambling -too! This is a picture of my daughter Cheryl back in 2005 dressed in her cap and gown for her High School Graduation- wow- time does fly by.
I wasn't sure what I was going to do with this sketch at first, so I found my papers that color coordinated with the school colors and went from there. All the papers used are from The Angel Company "Penelope set" which I just love all the rich -jewel toned colors here.
 
Other items used for this laout are: Tim Holtz distressing tool for the circle edges, Markers- white gel pen, silk flowers, Marvy and Fiskars  scalloped punches, handmade flourish swirls- painted on acetate with fabric paint, 1/2 flat pearls,  ribbon,  Karen Foster "graduate" and K&Company -keys- 3 of them.
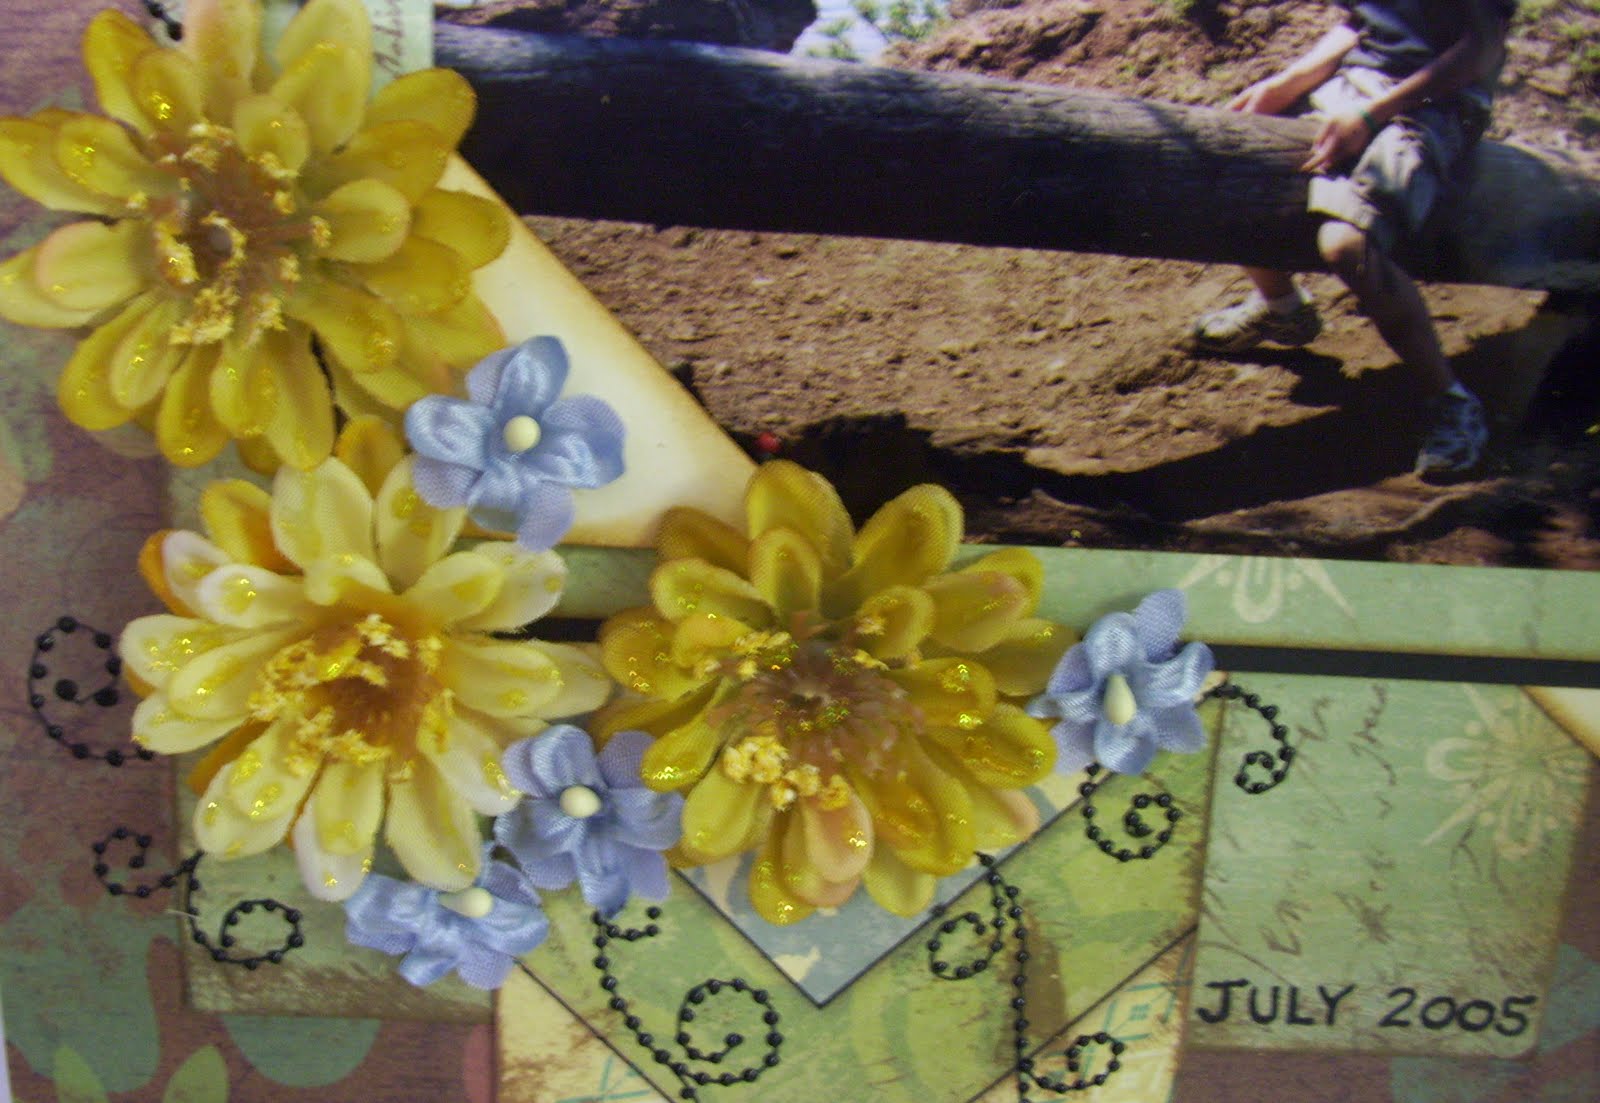
As you can see up close I punched scalloped circles and stacked them together and scrunched them a bit and added a silk florist flower to the center of them in either maroon or white, you can see part of my hand drawn swirls or flourishes, which I did with fabric paint with a fine tip to write of make dots with. One of the keys- which I added to the center of the flowers- giving my page that magic number of three (keys) for the vision of a  traingle.
In the purple area I decided -after I had everything laid out and glued in place to write all the different words- because I had a hard time deciding on one for a title. So that's how I came up with  "Keys to Success" So I used my white gel marker to hand write all the different words in the circle area around photo.. I added 1/2 flat purple pearls to the circle edge and thought it turned out pretty good- I'm happy with this page for my scrapbook . It's not too often I do a page for myself, but this is a favorite- one of my kids on their special day/moment.
Here is the sketch we worked from and I would love to seem what you come up with this week, especially since the challenge last Friday at Frosted Designs was circles---you could combine the two challenges together...well what are you waiting for - go create a masterpiece to get in on the wonderful sponsor prize we have to offer you for an entry/layout towards this sketch by August 8th by 10 pm.

Saturday, August 6

Butterfly wall hanging-for myself!

Here is another project I did the other day --for MYSELF- which I don't do to often. But I saw this idea in a magazine awhile back and thought I can do that and I added it to my very long list. So when I ran across this new lovely papers by Bo-Bunny with these beautiful butterflies- I knew what I was going to do with this paper. So before I forgot or filed the papers away I just said- Lets do it now!!


 I used all Bo Bunny 2 sided papers, cut out the butterflies (Gabrielle) and attached with pop dots and added black Stickles to them. I stamped some swirls onto the greenish yellow patterned background paper in Memories Chestnut and inked all the edges in Dried Marigold by Tim Holtz and Celadon by Versa Mark inks.
 Then for a little more bling I glued on some very small rhinestones in white, teal and green to the flourishes in just a couple spots in each frame. I found these little black wooden 4 x 6 frames at the dollar store for $2.00 for a package of 2- so of course I bought several packages for that price, I knew they would be put to good use someday.
Then lastly, I connected the frames together by using some teal velvet ribbon that I stapled into the back of the frame in between each one and made two hangers on the top frame and woolah it was finished  Yeah a nice wall hanging for my home. And I just love butterflies- so I will enjoy seeing this hanging up every time I walk by it- where ever I decide  to put it.

Thursday, August 4

A Lamp piercing project for my daughter....

A week ago I hosted a Lia Sophia jewelry party in my home and my daughter was my new advisor/consultant-(her first show also) So the night before, we had this brilliant idea to make some of our own display projects and boy did they ever turn out nice. We went shopping at Hobby Lobby to get most of our items- and the others I already had on hand at home in my craft room.
     I had this older crystal lamp base upstairs in the spare room- so we sprayed the shade black and I pierced  a design on eash side and the words LIA SOPHIA on the front. We trimmed the top and base of shade with ribbon and then punched several holes with my Big Bite  on the bottom of shade, so she could hang some dangling type earrings from it- how cute is this?  She is calling it the  Earring Lamp Tree.
Then I took an old picture frame that I already had and we painted it in her theme colors of black white and gold- I then attached a thick piece of foam board to the back which I covered with some quilt batting and a piece of sheer cream material which we purchased earlier that day. I then hand painted Lia Sophia all around the edge of the frame. She is going to use this as her display board for all the special pieces she wants to be sure to talk about. We then used some decorative pins to hold all the items in place along with a picture of her and her fiancee in the corner as her inspiration...to make a little extra money for their future wedding next year- in the Spring.
Then the last project we worked on for the total cost of only $3.00 we made two holders- one for necklaces and the other for bracelets- and I just love how they turned out. ( I might have to make me one for my bathroom) I had my husband help me with the band saw and the drilling of the holes to screw it all together, then we painted them and added some gold glitter paint and gold strand of beads and some really cute buttons on the ends (which you cannot see in picture).
Here is a few more pictures with the whole display of Lia Sophia jewelry set up in my kitchen
And the last picture is also of the chest we purchased from Hobby Lobby  for her to use as a jewelry chest of some wrapped gifts for future hostesses to pick from and the Earring  lamp tree ( which is hard to see the Lia Sophia punched out) but when you walk by it- it looks like the letters are moving-- it is so cool ! During the party that night everyone was complementing on how everything look so nice and they knew that I had alot to do with all these wonderful projects or display items that were made..I even got a few orders to do some lamps for my friends.
Well thanks for stopping by and looking at the few projects that have kept me busy the past week- I was so caught up with this hosting of a jewelry party, I didn't get much scrapping done- but I sure had a good time hanging out with my daughter and doing crafty things, and the party was a big success for I and my daughter...now I can't wait till all my wonderful jewelry comes in - so I can wear them.

Tuesday, August 2

D E B -just for me.

A project just for me----something that I have made and already have hanging in my scrapbook room. I made these a few weeks ago and thought I would have them posted while I'm on vacation in Las Vegas for 10 days. Since I won't be working on any challenges during this time.
 As you can tell my favorite color is lime green and  second is teal and then purple, which is represented very well in these large 7" wooden letters I purchased from Michael's awhile back for $3.00 each plus used my 20% off entire purchase coupon. They were already white so I didn't need to paint them so I left the sides white and just covered the front of them with papers from We R Memory Keepers paper stack.
 With each letter I stamped with Martha Stewart alphas a word that I choose to describe myself- using the first letter of= D -delightful   E- energetic  B-brilliant using black Staz-On ink. I inked the edges in either teal or lime green inks and then used my Yes paste to attach all the embellies on each one.
 Embellies used were: silk flowers, decorative fibers, chipboard covered in papers and cut out, floral ribbon, brads, buttons, scrappers floss, Stickles, Prima butterflies, and precut chipboard for more words.
On the little precut chipboard pieces I added a few more words to each letter that I also liked- examples devoted-determined-discover /  explore-exciting-enthusiatic /  bubbly- beautiful-bold. The letters already had the hardware on the back to hang so I did as soon as I finished them. So the background color of lavendar are the walls in my craftroom- such a pretty shade of purple. Well thanks for stopping by and have a great day!

Monday, August 1

Sassy Lil Sketches

Here is my take for the sketch at Sassy Lil Sketches this week. Another green layout for me- love this color so I have lots of greens in my paper stash. So I thought I'd use some more of it on this layout of my son and me and my mother on his graduation day back in 2005.
 I used papers by Jillibean, Paper Salon, K&Company and plain cardstock. Recollection and Marvy punches, ribbons, staples, pearls, CuttleBug and folders, and my own handmade flourishes.
Here is a close-up of the embossed butterfly with my CuttleBug and the handmade flourishes that I used a fabric paint in cream and made the dots on acetate and then trimmed real close to the design and attached with my Yes paste.