CLICK HERE FOR FREE BLOGGER TEMPLATES, LINK BUTTONS AND MORE! »

Wednesday, July 31

Musher's Camp in Alaska

 An excursion while on their cruise in Alaska- Musher's Camp with the sled dogs... I love to scrap the outdoors- and this one was fun to do. I had a lot of memorabilia and photos to work with- so I did 6 pages of this event for her. In this next layout, I have a brochure -which can be lifted up to read all about the camp and a photo of their ticket stubs and cruise itinerary- a few other embellishments including the white stamped paw prints all over the page.
  Man's Best Friend 2 page was a simply layout so you could see all the action is the photos of the dog sleds- embellies used where ribbon on the corner of pics , washi tape, some red square epoxy stickers, cricut cut out titles and alpha stickers
  Of course, they had to go cuddle with the puppies...AWWW how cute. Here I used some doggy print papers I had and some black embossed bumpy paper ( not sure where or how long I have this paper- but I found it in my stash) and I just hand painted the words right on it and made some other embellies with corrugated chipboard.

Monday, July 29

Breathtaking Views

     These next two layouts of the Alaskan Cruise are my favorites- I'm not sure what I like best -the colors-the simplicity or the photos- they are Breath taking that's for sure
 I used her Alaskan papers then just simply matted pics in white along with a few embellishments that she had in the supplies like the laser cut ship for Alaskan Cruising whale & hawk and the port hole. But, I didn't use the tree/sun insert that was in the port hole--I cut out a picture and put it behind  instead- how cool is that?
     On both of these pages I used this new silver glitter paper- it is wonderful to work with and very shiny but doesn't leave any messes- I did the titles with this special paper ( I need to get me some more)
   The great Outdoors is so simple- but really pops out at ya- Love it and the colors of red, white and teal in the photo- go so well together.  Another Gypsy welded Cricut cut and banner with the word wonder stamped on them
 Of course they went to the Captain's  reception/dinner one evening and took a few photos of the wonderful staff- so again with the simplicity and theme I used a big anchor for the embellishments and a captain's hat along with a few journal spots for her to write in- along with the wonderful selection of Alaskan themed papers to choose from

Friday, July 26

Alaskan Cruise


 Here are some more fabulous pages for the Alaskan Cruise book I did for a friend. I tried to keep all the pages fairly simple and to the theme, and she didn't want a lot of journaling to be done- so only a few pages I would put a spot or tag for that. Here I used my Expression to cut out the life savers and colored them and put black cord on them and pop dots for 3 dimensional
Since they go on a lot of cruises ( which I have never been on one- some day I will) they took some pictures of what I call the cloth critters in their rooms- I think they are so cute.
While on the cruise the girls took a few fun arts & craft classes to here is a page dedicated to the jewelry class they had fun doing. I have attached a few odd and end jewelry pieces to the page and used some colorful background papers since there wasn't much colors in the photos, and some washi tape-including on the alpha letters
I like the pop of colors I did on this page of the girls singing  Karaoke while on the ship. So I took a clue from the colors or the patterns in there clothes for the background paper and then just added the cricut cut title & names in some bright colors of hot pink and glitter gold

 Whale watching while on the Alaskan Cruise- how cool this must be. The pictures weren't the greatest- but you get the idea of the activity they were doing on this cold cloudy day. I love the cute whales that I cut out and added some water spouts to and the clouds above. And the whale paper was one of the papers she already had in the supplies to use. And below was a fun page to scrap- it was my friends Birthday while on their vacation so with the Cricut I cut out the title and some colorful balloons and with white acrylic paint did the mats for the photos

Monday, July 22

Finished 83 pages of Alaska Trip

    Oh my!!! Yes, I just finished 83 pages or layouts for a friend and her Family on their Alaskan Cruise...so I will be posting quite a few on here in the next few weeks. I started doing these pages the beginning of June while on a weekend retreat (got 68 done) and then this past weekend did the rest of the them and I finished last night. 
 My friend- gave me the pictures in envelopes for each activity or day while on the cruise...then I do the layouts to my likings or ideas. She also, has a large 12 x 12 storage box filled with papers and embellishments that she collected or bought while on the trip- to go with the theme of this trip/cruise. So I do my best to work with the products or supplies given to me.
 But, sometimes it doesn't work out for me and I use other papers and ideas or embellies that I have made. Like in the above 2 page layout -I used an old map and made the sun bursts/circle embellies.
 I also have been given permission to cut the pictures to work for me and my layout ideas...which is great- otherwise its really hard or makes for a lot of pages if you have to stick with the 4 x 6 size photos.
 Here is one of the lazer cuts she had in the supply box for me to use- just had to find the right size pictures and lots and lots of fussy cutting to put all the colors of cardstock behind this lazer cut.
 And sometimes- I have to work with large photos that they had taken by the cruise or travel planners and I don't want to cut these up- so it doesn't leave a whole lot of room for much else- so I like to keep it simple as I can and like to work with the memorable that goes with the vacation...like postcards, tickets, and itineraries
 And- to work with some of the wonderful lazer cuts she had for me in the Cruise supply box were wonderful and expensive- so I wanted these to be the main focal point also...simple but you sense the Alaskan them in the pages without a whole lots of embellishments going on.

Tuesday, July 16

Sometimes...Change is Good!

     I usually don't do layouts or pages of myself- so this was really stepping out of the box- as so was this hair cut/style/color-everything. I always have cut my own hair- well trimmed it- or had a friend cut it once a year- so I basically have had the same hair style since the 80's..I know that's bad-but was afraid of change.
    So, my daughter came over for the weekend to visit me and she decided- I needed a New ME, (I was also going thru a divorce at this time)-so she called my cousin who is a hairdresser at a saloon and scheduled an appointment (at my cousin house for that day). I didn't have time to even think about it...which was probably a good thing or I wouldn't have done it.
Too make a long story short- which is what style they had decided for me from long to short...so a cut and then low lights & high lights then a trim and 3 hours later it was done. It was different that's for sure- but I liked it. And my daughter took a few pictures during the process- so I decided to scrap a page for ME. I still need to journal on the page. I used all scraps(some very old paper) and made my own punched flower embellies and a Cricut cartridge for the title and scissors and added a silver brad.
This was done two years ago- and now I have my cousin trim and do my highlights every 3-4 months- she won't let me go any longer than that. So I learned, sometimes Change is Good!

Monday, July 15

Lake Tahoe - a leisure drive

     I'm finally getting to posts these pages I did of my second visit to Lake Tahoe a few years ago, while I went out to Reno for the Women's National Bowling Tournament in the month of May. Lots of big pictures and some memorabilia that was included on these layouts, which didn't leave much room for embellishments or patterned paper.
 I like this first layout that I used part of the map of Lake Tahoe to show the route we took around the lake and a post card and a few ferry tickets that we also went on during our 3 day visit-which is where these photos were taken while on the Ferry. I used a white marker and wrote a description of what the pictures were taken of underneath them.
 More beautiful scenery pictures while we were driving around in our rental car. I believe I used Graphically speaking for the Cricut cutouts  used in this layout- and 8   4 x 6 pictures again, and in the layout below -all of Lake Tahoe- with the simple title  A leisure drive around Lake Tahoe...I really like the paper I found in my scrap bin for this one-perfect -it looks like mountains- but really diamonds.

Friday, July 12

I have been blessed with....

                                                 I have been blessed with Four of the Best...
      I love this project that I put up in my living room the other day. I already had the four frames of collages done- (which I did about 10 years ago-way before I started to scrapbook) I went thru all the pictures of each of my 4 children and cut them up and did individual  frames( 11 x 14) for  Linda- Cheryl-Brian & Eric. All the pictures were from the time they were born until they were in 8th grade, so about 13 years worth- wish I had some of these to scrapbook now tho- but this will be a special keepsake for each of them in the years to come, when I decide to give it to them...which  might not be for awhile now-  lol. I had taken these frames down about 2 years ago when I was going thru my divorce and thought we were selling the house...but we didn't and I know own the home and thought lets put a few things back up on the walls and found these in the storage room.
I haven't used my Cricut Expression to much to cut vinyl- so this was a fun project to work on. I'm not sure which lettering cartridge I used, but I think it was Lyrical letters- I tend to use this cartridge the most. I also cut out a few hearts in the black vinyl and now I love to go into my living room and just look at all the great memories - and how grown up there are (now 22- 28 yrs. old) The hardest part was hanging all the frames even. Sorry for the glare on the one frame, and I didn't use transfer paper either, so this was a little tricky-but I think I put the letters up pretty straight.

Thursday, July 11

Party Time and more twine

It's Party time in the U.P. and more twine on this layout which, I did for my son Brian's scrapbook. I like to tear paper-as I did again on this page and then punched holes with my Big Bite and added the twine in the three areas- added a few embellies and the puffy alpha's and this page was done. I will be entering this layout also at The Studio Challenges this week for using -Twine

Wednesday, July 10

Amazing Acts and colorful

The Studio Challenge this week is to use twine in a creative way...I had to get creative with these colorful and amazing pictures that were taken on a cruise ship. I torn the blue graph paper to resemble the props on this stage and then took twine and strung it along the two pages and added several different colors of ribbon to pull out the colorful costumes of the performers, while they were doing many Amazing Acts- which was a Cricut cut -covered in glitter & added a few rhinestones and hand painted the white on the pictures as mats/borders


Friday, July 5

Banner for Bear -made with Love

                    Made with Love for my little BEAR- Barrett James born June 23rd, 2013
 Finished and hung in his new nursery this weekend - how adorable is this- and he just turned 1 week old when we put it up- now I did that quick!
First I decided in the papers for the Letters-which took me the longest time- why ? because I have so much paper I wanted to make sure I found the right colors and patterns for this project I had visioned in my head
Then I decided on the size of banners I wanted and cut the chipboard out

I was originally gonna put burlap on the chipboard and then the letters- but I didn't like how it was looking- it was all blending together and didn't care for it- so plans changed and I decided on the plain pearlized cardstock as the background- so I glued that onto the chipboard.
As you can see in the above pic- the letters didn't stand out against the burlap. I used pop dots and inked all the edges in several different colors of ink browns and greens and then doodled or drew faux stitching on all the letters and then found the cutest embossed Bear paper- did some fussy cutting and placed several bears around the letters- oh so cute- I amaze myself with some of my ideas...lol I then added a hand drawn border in brown ink/marker around the edges of the banner found some brown with green polka dot ribbon to tie on - and hung this adorable name banner in BEAR's nursery.....handmade with much love for my first grandchild!


Wednesday, July 3

I'm a Grandma- how wonderful it is!!!

 The arrival of my first Grandchild Barrett James on June 23rd at 12:01 pm- 6lbs 15 0zs 19 3/4 in long- how exciting this is...... Here is me holding him for the first time and he is only a few hours old... and he is already opening his eyes and grabbing my Heart!
 
This is our 4 generation picture taken just the other day when he was exactly 1 week old..
Baby Bear, my daughter (new mommy) and my Mom (great grandma) and Me(new grandma) holding the bundle of Joy.

Tuesday, July 2

Brag Books for the grandmas

A week before the baby shower I had for my daughter on June 22nd, I decided to make all the great grandma's (4) brag books...not just plain brag books. I went to Big lots and found these photo books for $2.00 and thought -these would be great as the base of my project and save me a little time from making the binder for these 4 books. Then I went to Joann Fabrics which was having the best sale 60-70% off. I found this great paper stack of 48 papers for reg-19.99 for $7.00(what a deal).  Went home and this is what I did with only spending $15.00 for all 4 of them.
I made all of them the same-I work on them like an assembly line-which saved a lot of time- which I didn't have a lot of -since I waited till the last minute to do these- but I finshed them all in 12 hours or two nights of working on them. Lots of inking and cutting of mats.

Each book had 12 pages-so that's 24 sides all together to put all kinds of pictures in . On the inside cover I have an area where they could write down all the grandkids and great grand kids names and birthdates- which in the pic above its the middle top page.

 Here is a view of the different pages which I also wrote in pencil the size of the mat cuts for them to add all there pictures
I was really happy how these turned out and I'm sure the great grandma's will truly appreciate them- in fact I'm jealous- I wish I had made one for ME...figures now I don't have a brag book and this is my first grandchild...Hmmm I think I know what my next project should be!

Monday, July 1

OH BABY..shower items and decor

I've been very, very  busy getting ready for the baby shower I threw for my daughter a week ago on June 22nd at my home and here are just some of the  wonderful items and decorations I have been working on for over a month.
 Above is one of the gifts I got for the parents-to-be and used it as part of the shower décor to put all the goodie bags in for all of the 45 guests attending. Simple white lunch bags with a embossed green or yellow cardstock and a onesis cut from my cricut and stamp in black ink "welcome little one" and then made a thank-you tag which we tied on with ribbon.
 This table in one of my craft rooms was filled with all the items for decorations....I made a few diaper cakes also- my first attempt-and I like how they turned out. I made a few banners to hang outside with large storks that I drew.
 Another picture of the banners and another diaper cake with I used a few cricut cuts of baby items to put on the diaper cake.
 The morning of shower getting the place decorated. I bought bibs and onesis and hand painted on each of them and hung them on the mantel and in the kitchen area. The gift bags were for the winners of the few games we played. On these I cut out a large umbrella and rain drops and found some soft green papers and put on the front of each back with the saying "From our Shower to Yours" which I did with my cricut machine and put the marker in place of the blade and let it do all the writing for me- first time I tried that also- works great!
 A few more hand painted onesis in kitchen area.
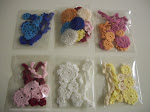
 Diaper cake in kitchen with some handmade streamers hanging from the light- yellow cardstock-some stamps and scalloped punch and these were very simple to make. Below is a close up of the shower bags and the wrapped brag books I made all 4 great grandma's, which I will be posting in the next post.
Well- the shower went great last week and to all of our surprise - my daughter went into labor while opening all the gifts at the shower- so she left in a hurry to drive 2 hours to her home town and doctor and by the next morning  they had a baby boy!!!! So this was quite a weekend for all of us. But, I'm so happy to be a grandma- to our little new arrival Barrett James- but we are calling him Bear!