CLICK HERE FOR FREE BLOGGER TEMPLATES, LINK BUTTONS AND MORE! »

Friday, December 30

Some cute little gift bags and tags

I made about 70 of these cute little gift bags with tags for  my friends at work, my bowling buddies and my relatives- each bunch of people got different goodies in their bags. Some, I made my Christmas tidbits (seasoned oyster crackers) some received a variety of chocolates, and the other relatives got gummy bears- which everyone seemed to enjoyed what ever they received. So of course, I was making these too --at the last minute- so I wanted something fairly simple to put together 70 of them in an evening or so.
 I already had the little plastic bags on hand- so that was great- didn't need to go out and buy them. Then I remembered that I had bought a few bags full of cardstock scraps from the Scrapbook Expo for $2.00 and Yes!-- I found this shiny white cardstock strips in the package- so I used it all up. I knew I would put it to good use sooner or later.
 I found a simple tree cut from Christmas Cheer Cricut cartridge and again went thru my larger scraps of green paper and cut out 70 trees and  also cut from Tags, bags, boxes & more cartridge 70 tags out of white cardstock.While that was all cutting went to my stash of red papers and found 5 sheets of the same floral leaf-berry paper and cut them into 3 x 3 squares and mounted them on my white cardstock -which I earlier used my scor-pal to make all the fold lines
 Then when everything was finally cut I inked all the edges of the trees with brown and the tags I inked in multi colores of pink, red, blue and greens. next step-- was too get my stamps out and stamp all the tags with my saying "Joyful Greetings" and on the back I stamped a swirl design and " handmade for you" then took a red marker and wrote my name. Then with scrappers floss I curled and tied it on the tags and used pop dots to attach them to the card- for a little more dimension  and then I quit for the evening after about 3 hours.
The next day I filled all the little plastic bags with the different goodies and stapled them to the back side-inside the tag holder...and put them into the boxes for each group of people I was handing them out too. Some of them I wrote their names on ( on the tree) so I knew who was getting what. I had fun making  these little goodie bags this year- I always come up with a new project every year for my friends and family - so they kinda expect something from me and it is always something handmade with LOVE.
   Note* the gummy bears I had were soaking in vodka for 4 days prior to putting them in their bags- (keep refrigerated)- thats why I also had names on the tags, so I knew who was getting these with alcohol (which the young/old  folks really liked them)  lol
 Thanks for stopping by and checking out my little project last week--Wishing you all Happy Holidays and a very safe and Happy New Year.....

waiting till the last minute this week

Here is the quick 2-page layout I did tonight for Sketches in Thyme. I had a  few hours to spend in my clean and reorganized craftroom, so I thought I would do one challenge during these busy holidays. It's pictures (that are not very good in lighting) that I took when I took my girls ( the dogs) to Bass Pro Shops to have their pictures taken with Santa in the beginning of the month.
 I used white cardstock for the background, Daisy D, and Basic Grey papers and some ho-ho ho paper from my stash. Cricut cartridges were Ashleys Alphabet & Christmas Cheer for the title and all the snowflakes. I used Tatered Angel Mist in lime green and Espresso for the title and covered the snowflakes with a light blue Stickles.And some distressing done in Vintage Photo ink by Tim Holtz.

The girls had so much fun running around the store (of course on leashes) and visiting with all the workers and customers- they just loved all the attention they received from all, and all the treats too.

Friday, December 23

My DT project for cloth/fabric challenge

I decided to do a layout this week for the DT  and Challenge for Frosted Designs this week instead of a project- using fabric/cloth . Which was pretty simple to do. I titled my page Apple of my Eye..its a picture of my oldest daughter and her father back in the days when she was in high school.
I had so much fun doing this layout-and I really like how it turned out- even tho it took me a few hours to do- well worth it all in the end and my daughter will really appreciate this page also.The cloth/fabric is the burlap I used behind the picture, which I unraveled the edges a bit and used the twine to tie a bow on the corner of the photo.Materials used in the page are: October Afternoon for apple/checked paper, KI- alpahabet paper, Burlap, Tree Cut from Cricut - My Community, chalks, inks, Stickles, 4 apple brads, alphabet tiles cut out and mounted on barn red cardstock and attached with pop dots- and bakers twine for the banner effect of the title
I hope you get a chance to do a project and enter it over at Frosted Designs for a chance to win some fabulous prize they have to offer- Happy Holidays to all.

Tuesday, December 20

My daughter H.S. graduation...

I was busy this weekend and got 5 layouts done for challenges and here is another from Sketchy Thursday. The sketch called for a background broken up in 4 squares and to use 6 pictures which is alot- but I managed to find 5 with the same theme so here it goes for my take....
I used my scraps for this layout the school colors were royal blue and yellow so that was easy for the cardstock to find the blue, and their dresses were yellow and blue floral prints  -so the whole thing pulled together for me. I made the banner flag using Hero Arts banner stamps amd upper case Alpha rubber stamp set for the title. Tied on some blue cord with knots in between each flag. Did some simple journaling in the middle of the page, and lots of pop dots on the banner also.

Monday, December 19

Monkey Business...

Here is my take for the sketch from Sketchabilities  this week...and its a silly page of some older pictures I found of my daughter and a friend of hers having a silly sleep over and monkeying arond. I used Recollections (monkey cuts outs) K&Company (Rhapsody paper) and misc scraps of black and grey papers.
 I painted the mats of the circle cut out pics with white paint and added glitter to it (which doesn't show up here at all) Also with the white paint I splattered all around the edge of the page to resemble the white powder or whatever it is on their faces.
I used my Cricut to cut the scalloped piece of paper for the journaling area- which my daughter can do later. and a small circle punch for the title  and inked the edges in green. other materials used were pop dots, inks, chipboard flowers, hearts and buttons, scrappers floss and a Big letter M from my stash.

Friday, December 16

Frosted Designs-ribbon challenge (DT)

I was so excited to make this ornament for this challenge at Frosted Designs  this week... here is my ribbon pinecone ornament.
     I will have a tutorial on how to make this ornament on the Frosted Designs blog on Sunday- December 18th- so be sure to come back and check it out.  (just click on the name)
     It was very simple and fun to make this - and would make a great gift for anyone on your list this year. The dimensions on this ornament or 2" x 3" so it is a great size- not to big or to small- just right!
The challenge is to do any project using ribbon this week for an entry and a chance to win not 1 but 3 fabulous prizes this week from our generous sponsor GRAPHIC 45--- so be sure to give this a try and let me know how your ornament turned out.

Wednesday, December 14

SOUS sketch challenge

I was busy this past weekend doing layouts- it felt so good and of course I had to do the SOUS challenge love that blog site- great sketches and ideas all the time.
I always try to do a layout using all my older scraps if I can and this is the one I decided to do that with this week. So all the papers are from my Holiday stash. I used my Cuttlebug to emboss the trees and added Stickles to them also. Some misc gold vellum stickers on the photo corners, and ornaments cut out of paper and layered for some dimension. This is a photo of my daughter and her cousin (who is in the Marines) and was home visiting- they are the same age.

Tuesday, December 13

All Dolled Up...

This is for the challenge over at Sketchy Thursday this week and I found some older photos of my daughter at a variety of her high school dances- so I thought I would do a page for her. I was trying to pull the colors out of the dresses that my daughter and her friend  were wearing on top pic throughtout the layout.
The background floral paper is by Paper Studio"Boho Chick paper stack" and the strips are from my stash including the gold ribbon and the pinky/purple floral acetate by Mambly. I used my circle cutter for the musical paper and found some sticker alphas in the purple color that I wanted to pull out and applied them with pop dots. Inked the border of layout with black

I needed something else for this page - but wasn't sure whated- I didn't want to put flowers on this one- so I was looking at the photo and noticed the gold necklace my daughter was wearing and thought...I can make that. So I took out my acetate and Stickles and drew the necklace on the acetate then added a fine glitter in gold to really shine more than the Stickles. I then trimmed around the necklace that I had drawn and placed it on the page and I kinda like how it turned out. So why stop there I added some more gold stickles to the floral pattern paper in several areas and  purple Stickles in centers for some more added bling.

Monday, December 12

Clubbing...

Clubbing...back in the days that my daughter was in High School and they use to go to these teanager clubs at night(against my better wishes) and get all dressed up and stay out all night(well not all night but you know what I mean) Well I found these 2 photo's and thought I would scrap them for her book. I still have to laugh at those red leather pants my daughter had on- she must of thought they were hot stuff back then and they probably were.
I used papers from The Paper Studio and K&Company, black & white polka dot ribbon and lots of different stamps that I have in my over abundant stash. I stamped and cut out the flowers and added rhinestones to the center of them .

The title alpha's are from a book of letters that I punched out and added pop dots to attached them, and the purse and shoes were stamped also I added some silver Stickles to them

I also used more rhinestones on the center of the black and white diamond pattern and some more silver Stickles in the small diamond pattern on the paper- which might be hard to see. But this page has alot of bling which is what those girls were dressing up like back in the days..
                             I will be applying this over at Sketches in Thyme this week

Sunday, December 11

Over the River and thru the woods...

To grandma's house we go..... is the title of my layout this week for 2 challenges, one at The Paper Variety to use a Christmas song or lyric  and over at SOUS to use "tree" die cuts. This photo is of my 2 daughters and their cousin in Upper Michigan after Christmas one year. The girls decided to take therir first rode trip alone to Michigan to celebrate the New Year with family. And they went over plenty of rivers and thru the woods to grandma's house --so the title is so right for this page.
I used several Cricut cartridges on this layout: DoodleCharms (trees) Graphically Speaking (snowflakes) Accent Essentials (hearts) Calligraphy Collection ( title words) . I also used my Cuttlebug and embossed the trees and layered them with pop dots and used green and diamond sStickles on them for some added bling.

Papers used were by Basic Grey -2-sided paper with houses on one side and blue swirls on the other- .also used red c.s. for mats and title cuts, brown inks, Stickles in pink, green and diamond, Rhinestones on snowflakes and my Xyron can in handy tonight to attached the title on.

I added some Stickles to the hearts and snowflakes and some pretty 3 colored ribbon and made my own journal spot.  The sketch I got from my handy PageMaps 2 book page 29 a 8 1/2 x 11 layut I convereted to a 12 x 12.

Friday, December 9

BFF- glitter project

Here is my DT project this week for the challenge over at Frosted Designs to use GLITTER on a project- which was so easy to do- because I put glitter on almost everyone of my pages somewhere and with the holidays - glitter is everywhere.
 I love the colors and patterns in the K&Company papers I choose, which I mounted and torn the edges onto the black cardstock- so the colors really stand or pop out at ya. I cut out the butterflies from K&Comapny papers also and added glitter (purple) to them and used pop dots for some dimension.  The chipboard letters- I also covered in glitter the same colors of the alpha's.  I  reprinted the original photo on plain paper so it would look a bit different and not as colorful and cut them in two different sizes- so they kinda look like two different photos.
 I torn two areas and used black embroidery floss to weave the threads in- which I really like how this turned out...kinda represents friends tied together....
I made my own flourishes with black tulip paint and the saying is something I found in my stash of friend stuff, which I also put silver glitter on the frames edge. A simple layout but a big bang of color and I really like it and so did my daughter- which is the one with the strawberry blonde hair in the photo with one of her best friends9old roommate) taken a year ago when she came home to visit during the spring- she lives in Las Vegas and doesn't get to come home much- so this was a special time to get together with some friends.

Thursday, December 8

Sketchabilities #60- Best Friend

I found some older photos of my daughter and some of fher high school friends and she wanted me to scrap them for her- so here is one of the layouts I did with one of her friends (Lisa) as some candid shots of them during the school year.
I used Recollections Stack-Charming- which I just love all the papers in this stack, misc papers from My Mind's Eye, and stash sayings which the title Best Friends I mounted on 2 pieces of chipboad to give it more dimension.
I used 2 different flower punches and inked the edges and attached a rhinestone in the middle. I also hand painted with white acrylic paint a wavy border on the photos to also make them stand out a bit more. Stamped the branches with a rubber stamp and cut out- also using more of Tim Holtz distress inks.
I will be applying this over at Sketchabilities #60 sketch challenge- I changed it up a bit and used 4 photos instead of 3- but everything else is much like the sketch called for.

Monday, December 5

Homecoming 2002

Here is my take this week for the sketch challenge at Sketchy Thursdays
I used School pride paper by Stampin Station and blue and yellow cardstock. The title was also from School Pride pre-cut die cut and I stamped my own other embellies with sports stamps from Paper Studio, several pop dots and black ink- pretty simple but tells the story of Homecoming and the school spirit that week.

Fun trio= Holiday, tag & glitter


This month over at Scrapbookers Anonymous the challenge is to use the trio on a project- Holiday-tag and glitter. So I have done a 2 page Christams  layout with a believe tag and glitter on the tree and a few other places. These are a variety of family photos taken on Christmas day back in 2006- before I was scrapbooking so they're not the best and we did not pose for any of them...lol All candid shots thats for sure.
 I used several different papers by My Mind's Eye-tree patterned paper, Graphic 45=cut out tree, Anna griffin=green snowflake paper, Bo Bunny tags and strip paper in the middle, Memory Box=floral poinsetta fields design, Hot off the Press for 3 santas cut out, and white cardstock for all mats. I used my Cricut and Gypsy to cut out the title "Traditions" from a green glitter cardstock  and did a little journaling on a Bo-Bunny tag
I used coffee bean (brown) ink, red Stickles on the tree and traced the word -"December and #25" and used Ivory Flower Soft on the tree to look like snow. Then in my Christmas stash I found some epoxy sayings, holly and floral stickers and  scatterd them on the page.

Friday, December 2

Anything goes..at Scrap Our Stash

So here goes my 2 page layout called Double Vision- which I did a few weeks back and thought this would be great for the challenge this week over at Scrap Our Stash- ANYTHING GOES. - besides this has such  silly photos of my son and his girlfriend taken at college this past fall one evening...I think they were bored or something. But they sent them to me just for kicks on Facebook and I had to copy them and do some kind of page for his scrapbook.
 I don't know how they did the special effects- but I like it and thought they were pretty funny... I didn't want to use to much decorative papers to take away from all the silliness going on = so I found this black and white striped paper and pulled out the color peach in the polka dot paper and a die cut by My Mind's Eye "so sophie". Plain black cardstock for all the mats and used a circle punch with Making Memories paper(black and white patterns) and scattered them on the page with pop dots for dimension.
 I used my Cricut & Gypsy to cut out the arrows with the title cut out in the centers and backed with black cardstock. And use black ink on all the peach edges of  thecuts.
So just for kicks....I did a silly page for his scrapbook- which I'm sure he is gonna really like-great memories for him and his girlfriend. So I will be applying this over at Scrap Our Stash-Anything Goes challenge.

Friday, November 25

Frosted Designs Metal challenge-Ornaments

     Here is my project for the Design team at Frosted Designs to use Metal this week....So , I thought lets make some ornaments for my 2 (girls) dogs this year and so I got my Cricut Machine and Gypsy out and played around with the different cartridges and found this. I used Graphically Speaking for the metal banner and Christmas Cheer for the tag look ornaments in 2 sizes. I used a bright pink cardstock since I like bright colors on my tree lately and white cardstock for the banner and then cut out some medium weight aluminum the same as the banner.
 I use my light box and a embossing metal alpha template for the names and then used my Cuttlebug and folder to dry embossed the pink ornaments- which I then used 7 different colors of Stickles and colored over the embossed circles. I then tied and ribbon to hang  the ornaments  and made a bow with silver & white ribbons and glued them on the top. I  used 3-D Zots in between the two different sizes of ornaments and under the metal banner to give it more demension. Which  the inked edges in pink and silver helped a little bit more also.
It was hard to take a picture without the glare of the metal -which will make them show &glow and sparkle  really good on the Christmas tree- This one has the name IZZY for one of my dogs. On the other side is the same thing except the banner has 2011 embossed on it- which I forgot to take a picture of the back side --oops! So hopefully this was inspirational to you and maybe you might make a few of these simple yet cute ornaments for your family tree. So be sure to enter into the Metal Challenge this week over at Frosted Designs for a chance to win a fabulous prize from One Stop Card Crafts.

Thursday, November 24

Happy Thanksgiving to Everyone!!!

     Hope you all are enjoying this wonderful Thanksgiving Day...I am with my daughter and her fiance and his side of the family this year-due to the fact that I am going thru a rough time in my life- with my divorce, so its going to be a bit difficult to deal with the upcoming holidays....But, I know I will be with good company-- family and some new friends... so I am thankful for that this year, and knowing that my other 3 children (all in different states) are all healthy and doing well.
     So the other night, I thought what can I make to bring over to Thanksgiving get together that is creative-since I love to do this kinda stuff and I thought name cards would be simple and easy- so this is what I came up with and made 25 of them in about 3 hours.

 I went thru my fall stash of papers and embellishments and grabbed the fall colors of cardstock and used my Scor-pal and made the place cards first, then cut the papers to size and inked the edges and made little tags for the names and tied on some scrappers floss and curled it. The diamond shape embellishments were cut from a 12 x 12 special glitter patterned paper and attached with pop dots.
Inside I wrote on each one:  What are you thankful for this year? we will  fill/write it out before dinner and then during dinner we will go around the table and tell everyone what we have written. It will be a great conversion piece and a nice way to hear and talk to everyone at the table- all 23 of us - WOW- this might take awhile, but that will be the best part of it- so we can enjoy the great food that everyone has contributed to this great feast and wonderful day!
                             Thanks for stopping by and Happy Thanksgiving...

Tuesday, November 22

Pumpkin Carving-SWEET

Another layout I did this week is for Sketches in Thyme #60- which I only had this one picture to scrap, so I made it work with this sketch. It's of a pumpkin my son carved back in 2007- when the Chicago Bears were doing great...lol, and he did such a great job carving the Bear logo on this pumpkin I had to scrap it for his book.
 All the papers are from my Halloween stash- which is a very large 12 x 12 box full and some are quite old and have no company names on them- but they work just as well. The pumpkin saying sticker is from EK Success and I hand cut the flag banners. All the other embellies are to from the stash and put on with pop dots. I tore some paper and inked edges in purple, used black and purple pieces of cardstock for the mats. The black embossed shiny background paper kinda reminds me of the carving look on the pumpkin- and makes the whole layout really pop with the orange and pola dot papers I used.
 I did a little bit of journaling and then went over it in bright green chalk to stand out a little more. Also used some halloween ribbon and stapled them to the page. The cute little saying "Sweet" is perfect for this page- because at that time -- that is exactly the word my son used to describe his carving project...SWEET

Like Father...Like Son

Here is my take for Sketchy Thursdays this week. I took these pictures of my son back when he was in High School- because he reminded my of his father so much when he was the same age.
I used My Mind's Eye papers, Tim Holtz distress inks, expoxy buttons, handmade florettes with papers, brads, Stamps by Autumn Leaves and Stempendous, black inks and marker for faux stitching.
 On the background I splattered/flickered white and blue-grey paint all over page before I put all the pics on.

Wednesday, November 16

My first layout for My Mind's Eye challenge #19

I was excited to find this blog site --My Mind's Eye-- a few weeks back- but, I have so many challenges that I want to do- and not enough time to do them all. So, I put aside one day to finally do a challenge for My Mind's Eye- which I love all their papers- so pretty sometimes I don't want to use them- so I save them for that special page. Well here is my special layout I did with their sketch and to use the color brown, also. I just love this color combo.
Of course, all the papers I used were My Mind's Eye- So Sophie, Lime twist, Life Stories,and several paperes from the Complete Boy paper stack. I also used a circle punch, crimper, chipboard inked and some sticker alpha's, teal ribbon, a florette (that I made) with My Mind's Eye paper, epoxy grey sticker buttons, and hand stitched in brown embroidery floss  -x- x -x- all around the edge and a few x x x on the kraft strip

Tuesday, November 15

Fantasy Island layout

I just love the colors in this layout!!! I did for my daughters book of one of her many high school dances. I will be applying this layout to several challenges- I used the sketch from SOUS- which I love their sketches and was inspired by the other challenge they have, to use die cuts-LEAVES....so two challenges are for Stuck on U Sketches and the other one was a recipe challenge over at Memorable Seasons to have the following :                 Scalloped edge- 2 pics- a banner- 3 leaves - and a pinch of stitching.
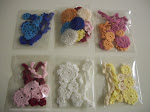

Materials used:
My Minds eye scalloped die cut paper
Bo Bunny peach dot paper
DCWV yellow paper (cricle chalked)
Basic Grey-teal paper
White cardstock for all cuts
Cricut Cartridges-Lifes a Beach/Straight from the Nest
Chalks, , rhinestones, Stickles,
blue embroidery floss for waves
Jim Holtz distressing inks- several colors
pop dots, yes paste
palm tree brad

I really enjoyed doing this layout-I could vision what I wanted for this layout and it all fell into to place so well- I like to make my own embellies so this was fun for me to do with all the leaves and flowers and stitching, inking and chalking- which took alittle bit of time so worth it.

Monday, November 14

Happy Birthday-DAD!!!--- 4 layouts

Wow- was I ever busy this weekend doing 4 pages for my kids scrapbooks using all the same pictures, but 4 different layouts and papers on them --I used the sketch over at  Sketchy Thursday to do one of the layouts for my sons scrapbook (who is in both of the top pics) . They (all my kids) were at their dad's house celebrating his 47th birthday a few years back and they took these few pictures and wanted me to scrap them. I have uploaded all 4 of the layouts in this post -  the first one I will be applying to Sketchy Thursday challenge this week.
     I used Tattered Angel Mists for the background on white textured cardstock and then went thru my stash and found strips of papers , then machine stitched the border in black thread added or stamped a few swirls . I hand stamped the title and the saying then cut them out and put on with pop dots. The saying is " You never know when your making a Memory."
 This next layout is for my oldest daughter's scrapbook (blue & grey sweater in center photo)  and I will be applying this over at The Paper Variety for the challenge this week "Family" All the papers used in the next three layouts are from the Recollections paper stack. I machine stitched around the inside border( blue and grey circle pattern) which matches the colors in my daughters sweater and stamped (Cloud 9) design all around the edge and some misc. leaves and saying inked with a light blue. Made my own journal tag and inked  all edges of mats with black. I like how I scattered the photos-and put them at different angles it gives the page some motion and fun like feeling- which is what my kids had- a great & fun time.
 The next layout is for my son who is in the yellow and brown striped shirt in the photo -so that is the reason I pulled these colors out for this layout. I used my Fiskars circle cutter for the 4 circles, brown inked edges and blue/teal ink for the mats, Stamps (variety) for the title -saying -leaves -hand cut out and attached with pop dots and some journaling on the circles. I like the color combo in this layout the best-which make the pictures really pop.
 And the last or 4th layout is for my other daughter who is in the top left photo - and I really didnt have a color to pull out from her clothing so I went with the pink - for her rosy cheeks....and browns. I matted all the photos with white cardstock (which make them stand out against the pinks and brown papers) and just inked the outside edge of the layout. Again, I used Papers from Recollections and all the same stamps- and did the journaling on the blue/teal striped paper. The "Dad" is not a stamp- I hand wrote them since I couldn't find a big stamp like I wanted.
I had a fun time doing these layouts this weekend and I'm glad you took the time to come and check them out. I know I have a silly madness to how I try to pull out colors and how I lay out my photos- so each child stands out in their layout- it also helps me to  remember which one goes in what scrapbook...if this makes any sense ---it works for me.