CLICK HERE FOR FREE BLOGGER TEMPLATES, LINK BUTTONS AND MORE! »

Thursday, March 31

Like mother-like daughter x 2

I just love working with the SOUS sketches- so I went thru some photos and found these of my cousin and her twins and thought this would work our great for the sketch . I titled it LIKE MOTHER LIKE DAUGHTER X 2.
 I used Fancy Pants, Bo-Bunny, KI butterfly lazer cut and special handmade rice papers, flower brads, glossy accents, sticker rhinestones, sticker alpha's, wood stamp alpha's by Studio G, 2 corner brackets brads, corkboard #2, inks in teal, green and black, pop dots, 2 handmade decorative pins, and 7of  my own handmade pink doiley flowers.
 I used a premade journal spot for part of my titled that I stamped in black and cut some individual butterflies from the lazer cut paper and added rhinestones and back with a light grey polka dot paper by Fancy Pants.
 Here is a close-up of the medium size pink doiley flower with a punch out with glossy accents added to the middle and 2 of my decorative pins added with pink and yellow beads.
And some more doileys and lazer cut butterflies with the rhinestones and some small green leaves that I drew, cut and inked in moss green. I then inked the whole border in teal

Wednesday, March 30

Handsome-young man

Here is my layout for the open challenge this week over at Sketches in Thyme- such as easy one to do. I picked my sketch from Page Maps book #2 that I bought this past Christmas for myself.  It is a 8 1/2 x 11 sketch, which I just made into a 12 x 12 with 3 photos. I really like how it turned out and I love the colors in this layout of my son at my cousins wedding back in 2004.


I used papers by Pebbles, Kaiser Crafts and Colorbok, chalks, brads, chipboard, alpha stamps,Martha Stewart marker, gold ink, painted thin mats around photos in Antique white, alpha stickers tags and inked edges in avacado green and gold.

Tuesday, March 29

The Scrappiest #112

Hopefully this isn't to late to enter-just finished it and realized the new sketch already came out-well going to post this anyway. This is the last Walt Disney layout ---yeah!!! until we went again a few years later, but I deal with that when the time comes. I'm just glad to have finished so many of these layouts in the past month. This one is for my son Eric's book titled EPCOT and the sketch is from The  Scrappiest #112 which worked out great for these photo's.
I used Little Yellow Bicycle-Compass paper,shiny silver scrap paper which I dry embossed with an old fiskars template in my Cuttlebug, akso embossed the white cardstock paper in the background, Stars and Title were Cricut cuts from Gypsy Font and Plantin Schoolbook cartridges, rick rack, red & gold star sequoins, red and yellow Stickles and pop dots.

Sketchy Thursdays sketch challenge

Here is my take on the layout this week over at Sketchy Thursdays- there is no title on my page it explains itself in the photo's. I used My Mind's Eye Complete Boy stack papers and white cardstock, Cricut cuts with Plantin School and Mickey & Friends, journal spot(yet to be down) brackets in chipboard, diamond Stickles and pop dots.

Saturday, March 26

Welcome to Frugal Fridays #46- a Day late!

     I know its Saturday-but didn't want to have 2 posts yesterday- so this is a day late, Sorry.. But, I am going out of town for the weekend for my yearly State Bowling Tournament and still wanted to be able to show you another great tip for the week. I was in the stores looking for those cute stick pin embellishments and I had a hard time finding them. So I thought- Why not make them myself ?  So I went to Hobby Lobby and bought some 2" Head Pins for $4.00 (qty 165) and headed home with another project to work on- as if I don't have enough projects to do..lol
I already had a wide variety of beads (another craft that I have dabble in) but, if you don't have them your craft stores have a large selection and usually have sales on the strands or individual beads. You then need some good adhesive glue like- super glue, E6000, precision cement glue or Yes Paste- which is what I used for these pins.

 They are so simple to make, the hardest part is choosing the beads you like- there are so many colorful and decorative beads out there. So all you do is put some glue at the top of the pin and on the stick part and add the bead or beads. If you use the Precision tip of your cement glue(not pictured) it is much easier to work with and you then add some more glue to the bottom of the bead and let it dry for at least 12 hours( follow directions for your choice of glue).
 I just made a handful here to show you - but still have 147 more I can make for my future layouts . I have pictured here the only two packages that I could find by Maya Road- and as you can see my handmade ones are just as nice and I can make them look however I want and I know I am saving $$$, too.
Well- I hope you enjoyed the tip this week, I know I had fun making these cute little embellishments and will be adding them to my layouts in the future for sure, probably with some of my handmade crocheted flowers- OH BOY! I'm really into this handmade embellishment stuff. Well I'll be back from bowling on Monday and back to my scrapbook room creating - hope you enjoy your weekend. 

Friday, March 25

Autumn Colors

Another great layout sketch from Creative Scrappers #147- I look forward to these sketches every week and this week I found two photos of my hubby taken in the fall.  We went to visit my mother in Arkansas for Thanksgiving and went for a long walk on her property which is the top of a mountain- it was so beautiful -which I thought would work well with this sketch- besides I didn't want to do another Walt Disney layout- getting burned out on that subject.
 I used all papers from Recollections  "Friends Forever" set, chipboard crimped and wrapped with yarn fibers ,many premade embellishments some rub-ons, stickers and tags which I inked them a bit or added stickles to them. I machine stitched in black around the inside border and also added copper Stickles dots around the edge.
 The leaves are stickers by Stickopotamus which I added pop dots -and rub-ons for the title words on the tag. Teal cardstock for the thin mats on photos to make them pop a bit. I used a rub-on saying above the photo on the right that  says "Falling for You" which is kinda hard to see- which I thought was a cute saying for this page.
Many colors of inks were used on this layout- browns, black, moss green, teal and copper for some distressing. I really enjoy doing nature layouts -and this one is just another one that I had a great time creating without to much effort- It must be the colors that I'm drawn too.

Thursday, March 24

Many Parks

Here is my take of the sketch over at Let's Capture these Sketches #74 this week. A variety of photos taken at several of the parks at Walt Disney World with my boys a few years back. Since there were so many different colors and many activites going on in the photos I looked through my older stash of papers and found this light colored wavy line paper and painted the light blue mats on the pics The green swirl paper is by American Crafts (older stack). I used alot of older embellishments like the chipboard buttons and some sticker sayings and alphas in orange for the title on the side. So I will be also applying this layout over at Scrap Our Stash - March Dust it off challenge -

Wednesday, March 23

Grandpa & Grandmas 50th anniversary


Here is my take for Sketchy Thursdays- and I just love the colors in this layout and it was a great sketch to work with this week. These phoots are quite old and kinda have alot of yellow tints to them so they were not the easiest to work with

Materials used:  Basic Grey, K&Compnay designer 2 sided, Me & My Big Ideas papers and black cardstock.
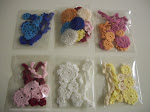
Prima Flowers and teal brads- Stickles in copper, gold and diamond
Inks- Salmon and blue
corner punch
Cricut cartridges- Heritage, Gypsy Wanderings, and GBS
Fine black marker for journaling and some doodling
pop dots and Yes paste

I hand cut the black embossed swirls from the K&Company designer paper


Tuesday, March 22

Carefree

Thanks for stopping by and viewing my second DT layout for Sketch Along Tuesdays  over at Frosted Designs for sketch #11 designed by Diane. What a wonderful sketch to work with- I like to work with several pictures when I'm doing my layouts. This page titled "Carefree" is just a few photos of my father during his retirement years enjoying his carefree days in Illinois and Arkansas. He loved his music and played many instruments-including the Tuba, he spent many hours fixing/restoring and repainting a 1948 truck, and spending time relaxing with friends and his buddy was usually by his side.
click on pic for enlargement
I used TPC Studio 2 sided papers and K&C papers for the mats on photos. Black and browns inks for distressing and acrylic paints in cinnamon and honey brown. Misc embellishments used were K&C border strip, Jim Holtz's chipboard wheel like- which I inked and wrapped with twine, many different metal brads, the other chipboard pieces were painted and wrapped with twine, gold and black marker pens and the Cricut cartridge 50 States for Illinois and Arkansas with some pop dots.
I put the title and sub title on little flag banners and ink the edges and added a few journal date spots along with a journal area at the top. I really like the photo of my dad in the middle so I matted it in a lighter cardstock so it would stand or pop out a bit more than the others. Well I hope this page inspires you to try out this sketch challenge and enter to win some wonderful prizes sponsored by Sweet Peach Crop Shop over at Sketch Along Tuesdays-Frosted Designs Can't wait to see what you come up with.

Monday, March 21

It's Magic- again

Its Magic- again another page for the 3 different albums I'm working on- I can't wait to get these Walt Disney pictures done and work on something new, almost finished a few more to go.
 This layout is for The Scrappiest #111 sketch this week and I used My Mind's Eye- K&Compnay( Daydreams) white cardstock and misc strips of papers. Chipboard buttons were heat embossed in white and yellow and ribbon tied on, Fence was cut from Heritage Cartridge from Cricut and chalked in light brown, Inkadinkado stamp on the background with Stickles added to the middle, and gold sticker alphas for the title.

Sunday, March 20

More Mickey layouts done for challenges....

Here is my take for The Paper Variety sketch #25 this week. I used We R Memories and Making Memories along with some scrap papers for the banner. I stamped the fireworks on the banners and on background  then heat embossed them with 4 different colors and added a sticker prism in the middle. Flat silver beads in between flags, black and blue inks, peach ribbon and circle & scalloped punches with some pop dots.

And this next layout is for Sketchabilities #43
I started off with black cardstock and just added some misc papers to represent the Mickey Mouse colors of black, red, yellow and white. I crocheted my own flower doileys and added a punched circle and a flower brad to the middle of them. I also did some of my own doodling in white gel pen and cut outs of the hands and the Mickey head balloons that I stamped a sub title on them. The" It's Magic" title is thickers and some rhinestones for shine on scalloped yellow scalloped area. I am so happy how this page turned out- wasn't to sure at first- I usually use alot of patterned papers, but with the black background it worked out. 

Saturday, March 19

Tree of Life

 Here is a 2 page layout I did this apast week of  our day spent at Animal Kingdom at Walt Disney World with my boys in 2004. This was my favorite exhibit at this park- truly amazing all the carvings in this huge tree trunk of all the different animals.
 This is my own layout and used  misc animal lokking prints for papers, cardstock  in several colors for all the cuts.
Cricut cartridges used were: A Child's Year, Zoobaloo, Life is a Beach, had cut the cuts and chalked, painted with Antique White around the photos ,brads, stickles and Jolleens animal premade embellies.
The tree is 3 layers and I chalked it and doodled with pen for more dimension, made a journal spot/ area in the middle of the 2 page layout and distressed some edges. This layout is for my scrapbook-

Wednesday, March 16

Our Love Story- 8 x 8 book

While my computer was down for a week I still managed to get a few pages done for a Bridal Shower gift for my step-son and his bride to be. And it turned out georgous I might say- I just love it and I have already given it to them this past weekend. I kinda procrastinated on this project- so finally a week before the shower I started this 8 x8 scrapbook with 20 completed pages and I worked very late several nights to get it completed by the time of the shower on Saturday. Her bridal color scheme is pink and yellow-so thats what I used along with black and white. I tried to use embellies of flowers birds, butterflies and swirls throughout the book to keep a theme consistent.  So this is kinda a long post of the 10 double pages- The title page Our Love Story already posted.  If you would like to see them larger , just click on the photo for enlargement. Well- Here it goes!
When We Met- small area to journal that specail day on left page
Good Times Together-
The Engagement- I made a journal pocket on left to write their story and tuck away
Bridal Shower (left) Rehearsal Dinner (right) each scalloped circle in a journaling spot
Bride and Groom page- don't ya just love the butterflies!
Mr and Mrs. Bakk I made the flowers from paper towels on this page and my own rhinestones to spell the last name out
Two large flowers wer just perfect for this page for the Bridesmaids and Groomsmen photos
Family Forever-   His and Hers. I used my Cricut for alot of the embellishments and word/title cuts
Cutting the Cake (left) First Dance (right)  I cut little squares and stamped letters for the title and used pop dots for more dimension
And last- A night to remember page for the happy couple with a misc assortment of embellies, and scrap papaers from throughout the book.
I found this cute pink with heart window album at Michaels (with 40% coupon) costing me only $10.00 and made a matching card from the scraps. They loved it and so did everyone else at the shower. I just love when I can create something that someone else will enjoy just as much as I did making it for them. Well thanks for looking at my first 8 x 8 album and I would like to  know what page you liked the most- I know I have my favorite page-(hint)-it has some butterflies on it.

Tuesday, March 8

I Collect Coca-Cola

Here is my DT layout for Frosted Designs- Sketch Along Tuesdays. When we were at Walt Disney World back in 2004, one of the parks had a Coca-Cola display and it really caught my eye-since I love to collect all kinds of memorabilia. So I took a few pictures and thought it would be a great layout to scrap one of my many collections. I used several papers from the Coca-Cola Co. papers- bottle caps, logo, signs, collage, and a red textured special paper for the Coca-Cola title, misc. alpha circle tags trimmed in silver and I tied thread and pop dotted them, painted borders with red acrylic paint on the photos, red crocheted lace trim, hand stitched with red thread around the border of the page, green chalk for the journal spot and some misc. Coca-Cola collectibles I had laying around.

 Here is a close-up of my own handmade crocheted lace trim in red. And the next close-up of the Coca-Cola title is hand cut from a red textured paper that I just traced from a wooden plaque (which was to thick to use here) that I had and cut it out and trimmed with black acrylic paint. The lady in the middle is an old postcard (part of my collection) that I cut.

Saturday, March 5

Nature is Calling..

Here is a comical layout of my son-Nature is Calling. We were on a camping trip and he just couldn't wait any longer- and I just happened to have my camera with me So why not capture this goofy moment for him. I will be applying this layout for the sketch #109 at The Scrappiest .
 I kinda change it up a little and put the title at the top so I could put the trees at the bottom. I used American Crafts, cardstock papers, cardboard that I crimped, misc alphas- paper and  epoxy stickers, twine, inks and metal brads.

Friday, March 4

Welcome to Frugal Fridays #44

Well the weather is still a bit cold here- but Spring will be here soon-hopefully- it's been a long cold winter. So I have been making alot of my own embellishments lately and wanted to share them with you this week. DO you know how to CROCHET? Well if you do - this week's tidbit is right up your alley. If not- maybe you know someone who does or you can learn how- cause it is very easy.
 All you need is a crochet hook (I used size E) and some cotton crochet thread (single or double ply)- so go through your yarns and thread and grab a few colors. I have been making all kinds of small to medium doiley shaped pieces to be used as flowers on my layouts or you can use on any kind of project. As you can see in this picture all the different colors and simple patterns that I used.  For those who know the craft  here is the simple pattern I did for the basic little doiley which make the cutest looking flower shape.  ( chain 4-slip stitch in first chain, chain 2 then either double or single crochet 12- 14 -16 or 18(makes the size a bit larger the more you do. Then slip stitch into the first crochet chain of that row. chain 4 slip stitch into the second chain and continue on chain 4 slip stitch in 2nd chain. to end and slip stitch together. It only takes about 4 minutes and you have it completed ! So while I'm sitting around watching tv or just keeping busy with some craft, I can whip up several of these in a hour.
 So I thought why not make some ribbon like crocheted pieces also- these are very simple too- but take a bit longer, but really look great when they are done. Again, I used several different colors, but I tend to like the cream or white because you can always spray mist them a different color if need be to match your layout colors. I used simple chain and single crochet patterns for these. I have found that chaining 70 is about the width for a 12 x 12 layout (size E hook), but some I made shorter- because you can't really cut these to easily without fraying. You'll be seeing a few of my future layouts using both the flower like doileys and the ribbon/lace pieces. In fact next Tuesday March 8th at Frosted Designs- Sketch Along Tuesdays I  used some red crochet lace in my DT layout- so be sure to check out the sketch challenge and wonderful sponsor for the month of March.
 Here is a picture of some ways to embellish the small flower like crochet pieces- I just got out some buttons, ribbon, brads, tulle, threads and other silk flowers and just started playing around and did a few to have ready.

click for enlargement
Then lastly- how was I gonna organize all of these? Well I just love the plastic 12 x 12 organizers that you can find in most of your hobby/craft stores ($8.00- $12.00- use those coupons) and I am storing all the crochet items that I make right in here. So if you already know how to crochet- that is great -because it costs hardly anything to make all these wonderful embellishments, which are a popular item lately to add to your projects. Well have fun crocheting and I hope this was a helpful tid bit this week. 
And if you do some project with your handmade crocheted item I would love to see it - so drop me a line and your blog to let me know- so I can check it out.